Do you love pizza but don’t know how to make the dough? Good pizza doesn’t have to be hard. This simple pizza dough for beginners will take a step back and start with the basics.
Making your own pizza dough is a lot of fun. But if you’re new to pizza baking, many things can go wrong in the process, and it’s often hard to understand why. I know the frustration, but I’m here to help you!
I’ve put together a foolproof pizza dough recipe for beginners. So you can make amazing pizza on the first attempt. You only need a few ingredients from your pantry and a little bit of patience to have homemade pizza that’s better than anything you can get delivered.
It doesn’t matter if you’re an experienced pizza baker or a complete beginner. Pizza is an art form that can take decades or a lifetime to master, but I believe anyone can make amazing pizza in just one afternoon.
What makes a good pizza?
First, let’s talk about what good pizza is. I know that’s different for everyone, but the crust is the most important part of the pizza. That’s how you tell a good pizza apart from a bad one.
A good crust starts with the right dough. Which will give your pizza better consistency and flavor.
In addition to tasting good, the crust should be crispy on the outside, but light and soft on the inside. To achieve this, you need to let the dough ferment slowly to develop flavors and bake the pizza fast and hot to crisp the crust before drying out the interior.
It’s all about the dough
To make good pizza dough, you need quality ingredients and a bit of patience.
Give the dough time to develop flavor
I see it all the time, on the internet, on YouTube, and even in recipe books. Fast pizza dough. But in fact, it’s impossible to make great pizza dough in 1 hour. Any professional baker would tell you good bread (pizza or any other type of bread) needs time to develop flavors.
Start with the basics
Most recipes online also list a bunch of ingredients you don’t need. Such as sugar, oil, honey, spices, or even mil. But a basic pizza dough consists of only 4 ingredients: flour, water, salt, and yeast. That’s it!
There’s a time and place for other ingredients, of course, but it’s better to start with the basics and master them before adding in more complexity.
The same goes for equipment and tools. I know it can be exciting to get into a new hobby and buy all the stuff. But unless you know how to make a proper dough, and master basic techniques I don’t recommend getting ahead of yourself.
You need to learn how to crawl and walk before you can run. It’s a learning process, and you need to know and understand each step of the process before jumping to the next.
Precision is the key to consistent pizza dough for beginners
The key to consistent, good pizza dough is precision.
Unlike cooking, baking is an art that requires precision. It’s like science. So adding too much or too little of an ingredient to your dough can have a huge impact on the final result. Too little yeast and the dough will not rise, too much water and the dough will be too sticky, and so on.
To always make perfect dough, you have to measure your ingredient accurately. And to do that you need a kitchen scale.
Firstly, it’s almost impossible to measure cups accurately, let alone 2.17 cups. Secondly, all spoons differ in size, mine might be smaller than yours! And lastly, 1 cup of pressed flour contains a lot more than 1 cup of lightly packed flour. So the only way to make sure you use the correct amount of an ingredient is using a scale.
What you’ll need to make pizza dough for beginners
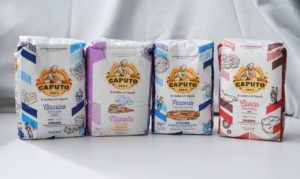
Most people think they need fancy Italian flour and an expensive
Even though you can use Italian flour and a proper
Ingredients
This recipe requires only 4 ingredients you probably already have in your pantry. And to make three 12-inch pizzas you need:
- 700g flour (All-purpose or bread flour)
- 450g water
- 15g salt
- 7g instant dry yeast
- (any cooking oil for greasing)
If you have pizza flour already, by all means, use it, but all-purpose or bread flour will work great.
1 pizza serves one to two people. And you can of course scale the recipe if you need more or fewer pizzas.
Equipment
When it comes to equipment, you’ll need:
- Kitchen scale
- Mixing bowl with plastic wrap or a damp towel
- An oven with a baking sheet
- (Optionally, a dough scraper or spatula)
You will need a kitchen scale to measure your ingredients. As mentioned above, to make good, consistent pizza, it’s essential to measure your ingredients accurately.
You will also need a mixing bowl to combine your ingredients and store the dough during rising. In addition to a regular oven to bake your pizza in.
The 3 elements of pizza
A pizza consists of 3 elements:
- Dough
- Sauce
- Cheese and toppings
In addition to the dough, your pizza needs condiments that highlight the flavor of your crust. That’s how I want you to think about the sauce, cheese, and toppings. I know this might sound backward… isn’t the crust simply there to make sure the sauce and cheese are not running away?
This is the reason Italian pizza usually has fewer toppings and less of each topping. It’s about the balance.
In addition to flavor, over-saucing or over-topping the pizza can also create problems, such as wet undercooked dough. Of course, you can top your pizza however you want, but don’t go too crazy.
What can go wrong? Why is it hard to make pizza?
Pizza baking is a series of steps. The reason it’s hard to make pizza is that if any of these steps are done incorrectly the result will not turn out as you expect. The problem is that oftentimes you can’t really tell until the pizza is done. And to backtrack to figure out where things went wrong is hard. It’s therefore important to follow the process and be accurate in every single step. And I promise you, that you’ll turn out amazing pies in no time.
The pizza-making process
Making pizza consists of N steps. Dividing pizza-making into steps makes it less overwhelming and easier to understand because you can focus on one step at a time.
- Mixing ingredients
- Kneading
- Bulk fermentation
- Portioning
- Rising
- Stretching and shaping the dough
- Topping the pizza
- Baking the pizza
In the following sections, I will go through each step and explain how to do it and why.
1. Mixing ingredients
There’s surprisingly much debate around how to mix ingredients for pizza dough. The order, and techniques. But I’ve chosen to go back to basics here too, so we will follow the Neapolitan way of mixing pizza dough.
1.1 Prepare and measure your ingredients
The first step is to get out your scale. I’ve already mentioned how important it is that you measure your ingredients by weight.
Measure each of the ingredients in a separate bowl.
One more thing worth mentioning is that you don’t want to add any additional flour during mixing or kneading than what’s listed in the recipe. The reason is that it will change the dough, and result in a denser and dryer crust.
1.2 Combine and mix
Start by adding the salt and room-temperature water to a mixing bowl, and stir to dissolve the salt.
Next, add around 10% of the flour to the bowl, and mix with your hand or whisk until you get the worst lumps out.
Then, add the yeast and dissolve it. After that, add the remaining flour gradually while mixing. Until it’s all combined into a shaggy dough.
Why this order
The reason we start with water is that it’s easier to dissolve both salt and yeast into the water. It’s also easier to add the flour gradually to the water than the other way around.
And if anyone is concerned about adding the yeast directly to the salty water, that’s why we add some of the flour first. Do lower the concentration of salt. But it also takes some time before salt negatively affects the yeast, so unless you leave the yeast for 10-15 minutes, you don’t need to worry.
2. Kneading the pizza dough
The next step is to knead the pizza dough to develop strength and structure.
2.1 How to knead pizza dough
Move the dough from the mixing bowl to your countertop. And make sure you get out as much as possible from the bowl.
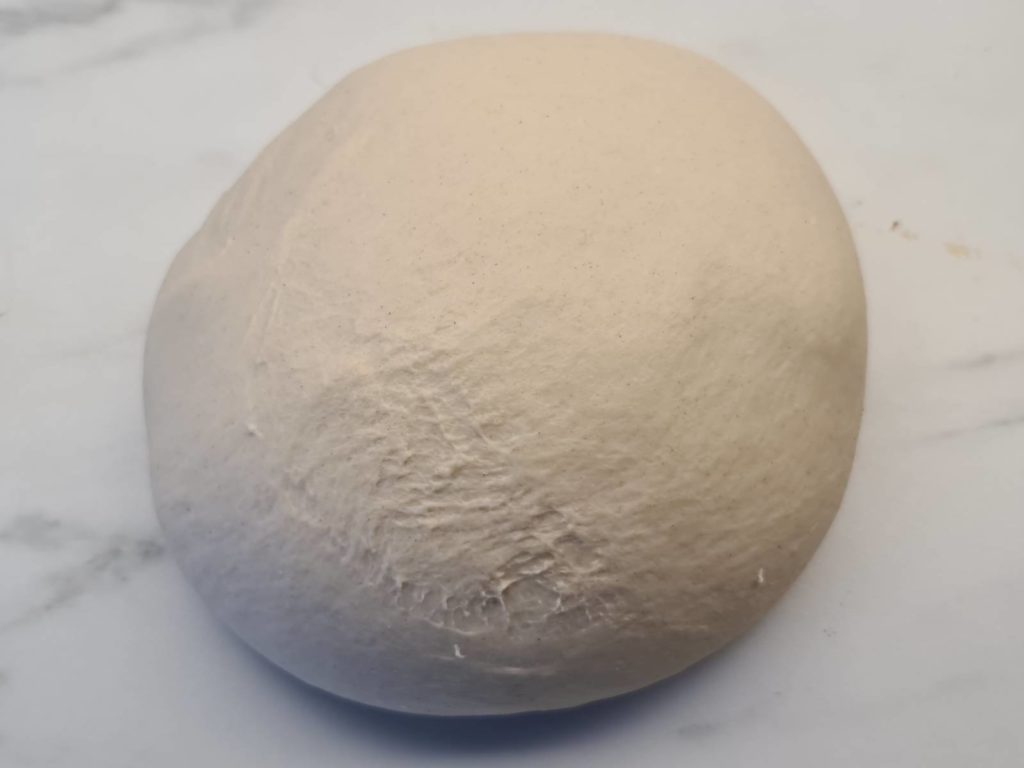
Start by folding the dough over itself until any loose flour is inside the dough. Then stretch and fold the dough over itself until you get a smooth elastic dough. It can start out sticky, but as the gluten develops the dough will get smoother and less sticky. This process will take around 15 minutes of kneading by hand.
It’s hard to explain in words how to knead the dough properly, so have a looking at this video from King Arthur Baking:
You can also use a stand mixer with a dough hook if you have one, but I recommend starting by hand. That will give you a better feeling for kneading and understanding of how the dough transforms.
When it’s done kneading
You’re done kneading when the gluten has developed properly. You can check that by using The Windowpane Test.
Take a small piece of dough, and carefully stretch it out as thin as possible. The test is passed if you can stretch it so thin that light shines through the dough. If the dough tears before it gets this thin, you need to knead more.
Why do you need to knead pizza dough?
You need to knead your pizza dough to develop gluten.
Gluten is a collection of proteins found in wheat flour. And when the gluten absorbs water, these proteins start to form a network, almost like a fishing net, that keeps the dough together. Kneading will strengthen this gluten network and give the dough structure.
Proper gluten development allows you to stretch the dough without tearing and also traps gasses so it puffs up in the oven and creates a nice, light crust.
When you knead the dough the gluten also gets tense, and the dough gets more elastic and harder to stretch. So letting the gluten relax is important before you try shaping your pizza. More on that later.
3. Bulk fermentation
Bulk fermentation is not necessary for this recipe because it’s a relatively quick recipe that only requires 4 hours of fermentation. You can therefore skip to the next step.
4. Portioning the pizza dough
4.1 Portion pizza dough
Roll the dough up, and split it into three equal portions, one for each pizza. They should come out at around 390g each. You can do this by simply ripping the dough apart, or by using a dough scraper or knife.

4.2 Make dough balls
Next, fold the individual portions and fold them over themselves a couple of times and make round, nice dough balls. Round dough balls will also give you a more uniform rise and round, and pizza.
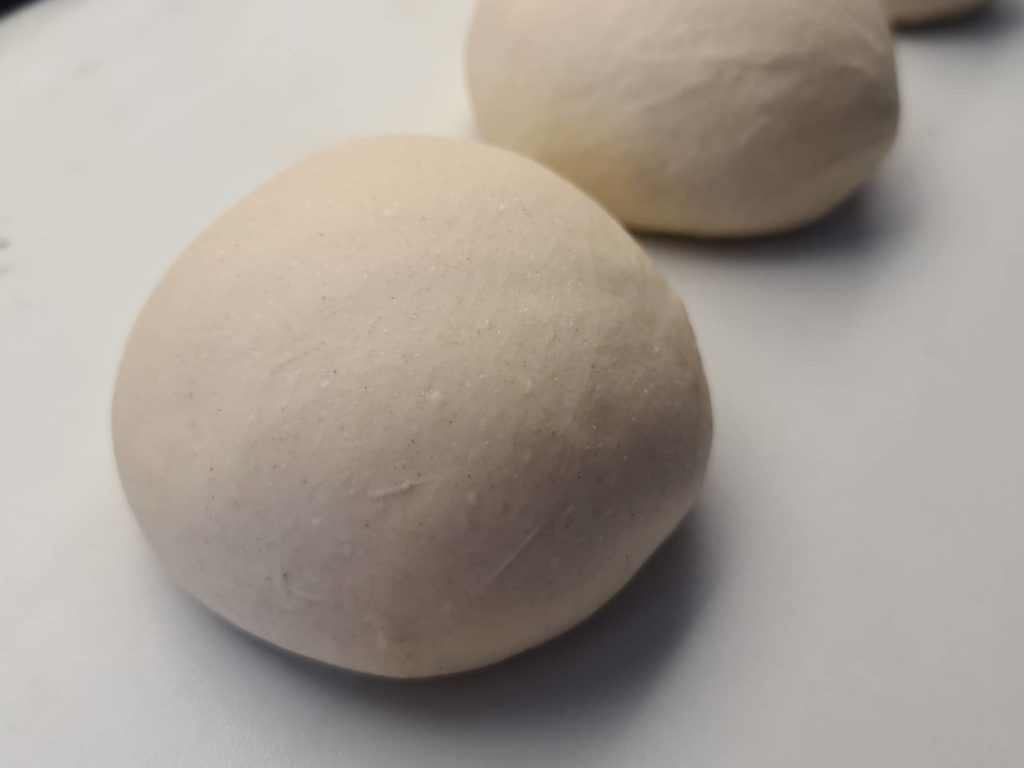
Why make dough balls before rising?
The main reason you want to make the dough balls prior to rising is to let the gluten relax. Relaxed gluten makes the dough softer and easier to stretch and shape. And if you make dough balls right before stretching out the pizza, the gluten will be too tense and elastic. Which means it will spring back, making it hard to shape your dough.
5. Let the dough rise
Next, let the dough balls rise to develop flavor and texture.
5.1 How to rise pizza dough
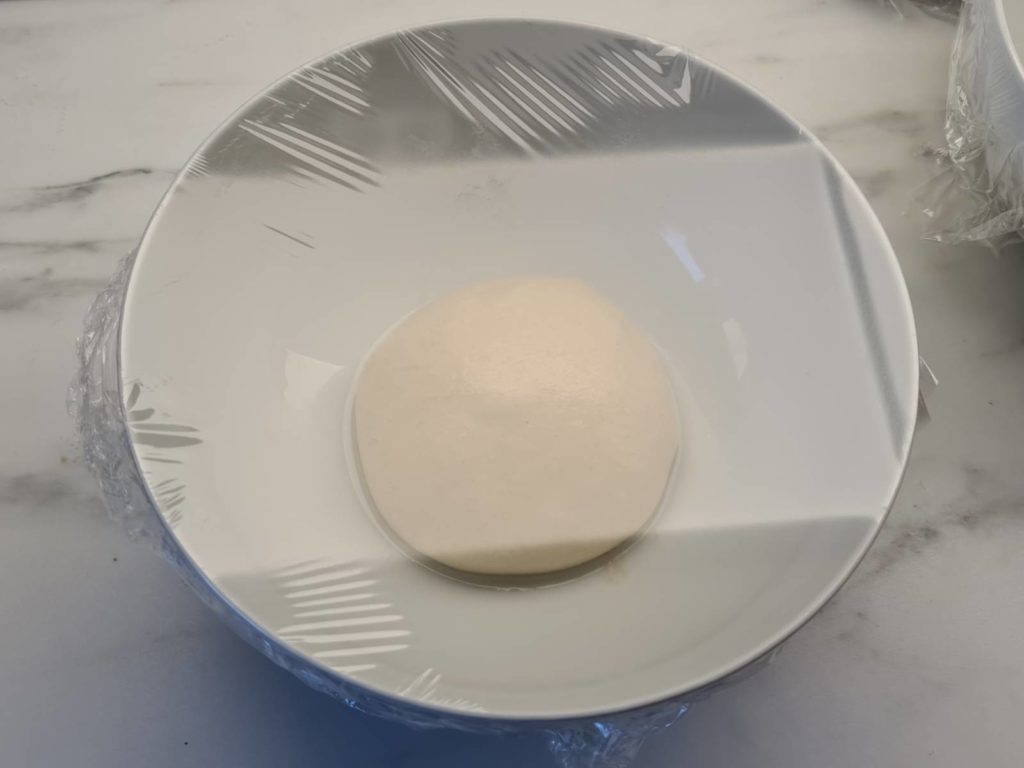
Lightly grease three bowls or containers with oil and place the dough balls in their own bowl. A little bit of oil will make it easier to get the dough balls out later. But it’s not necessary to use oil.
Cover the bowl with plastic wrap. This will prevent the surface of the dough ball from drying out. and leave the dough balls to rise covered at room temperature (around 72°F / 22°C) for 4 hours.
If your house is hotter, the dough will be done a bit faster, and if it’s colder it will take a bit longer.
How to tell when the dough is done rising
The easiest way to tell when the dough is done is by looking at the size. The dough is done when it has roughly doubled in size.
That’s the most important way to tell, you can’t blindly follow a timer. Because the exact rising time will vary depending on room temperature, humidity, the type of flour, gluten development, and so on. But if the dough has risen to 1.8 – 2x it’s ready to use.
If you leave it much longer than that, the dough will overprove. And what can happen is that the dough punctures and deflates. Something that will result in a compact and dry crust.
Why you need to let your dough rise
When you let your pizza dough rise, a process called fermentation happens.
Fermentation is a process where yeast eats the carbohydrates in the flour and converts them to alcohol and CO2. This may sound complicated, but all you really need to know is that yeast turns sugars into gas and flavor.
When you have proper gluten development, the gasses will be trapped inside the dough, and it will inflate. Almost like a balloon. That’s why the dough increases in size.
You can add more yeast to speed up the process, but for an even, better rise, you don’t want to rush the fermentation by adding more yeast because that will give you a less flavorful dough.
Another benefit of a fully fermented dough is that it’s more digestible. Because the yeast breaks down carbohydrates in the dough, making it easier to digest for your stomach.
6. Stretching the pizza dough
Time to stretch out the dough to get it ready for toppings
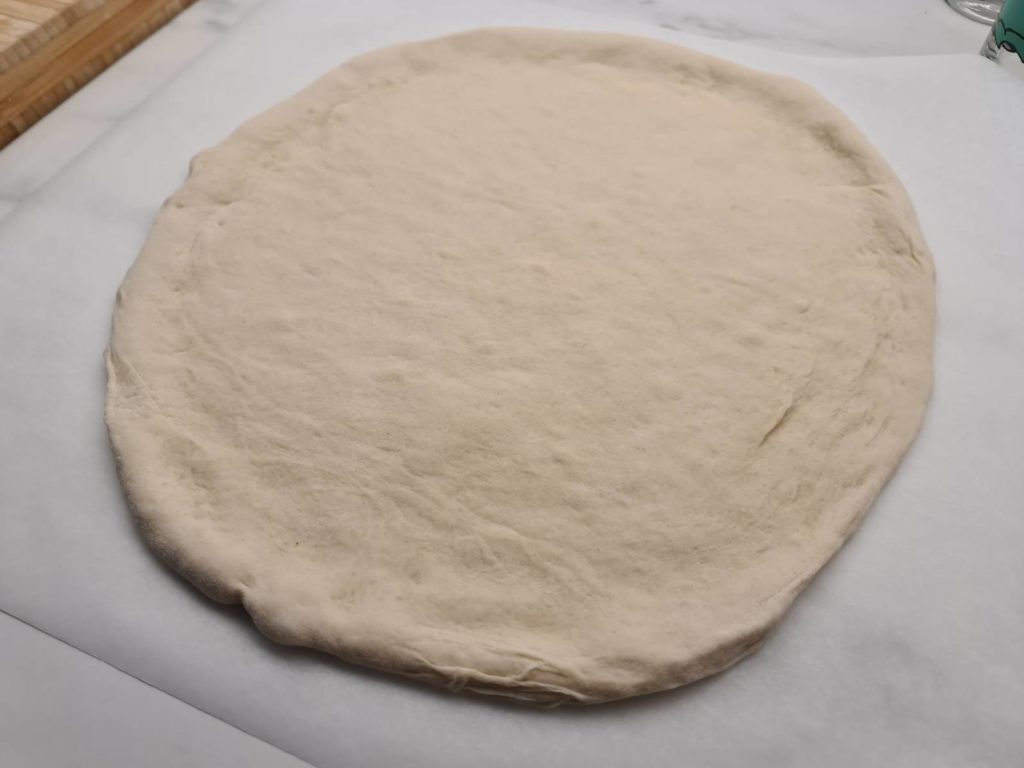
6.1 Initial shaping (opening the dough)
Prepare a small pile of flour on your countertop. Then turn the bowl with the dough upside-down and let the dough fall softly into the flour pile. The dough might need a little bit of help, but try to be careful to not deflate the dough.
Turn the dough and make sure there is flour on both sides. Then, move it to a clean part of the countertop.
Press the center of the dough using the palms of your hands, to create a rim of around ½ inc (1 cm). This rim will puff up and create a nice, airy crust. It will also help keep your sauce, cheese, and toppings in place.
6.2 Stretching the dough
There are many ways to stretch the dough. But the easiest is to just keep pressing it thinner and thinner until you reach a diameter of 12 inches (30cm). But make sure the base is even in thickness.
6.3 Move to a baking sheet
When you’re done stretching the dough, move it to a baking sheet. You can also use parchment paper if you’re scared it will stick to the baking sheet.
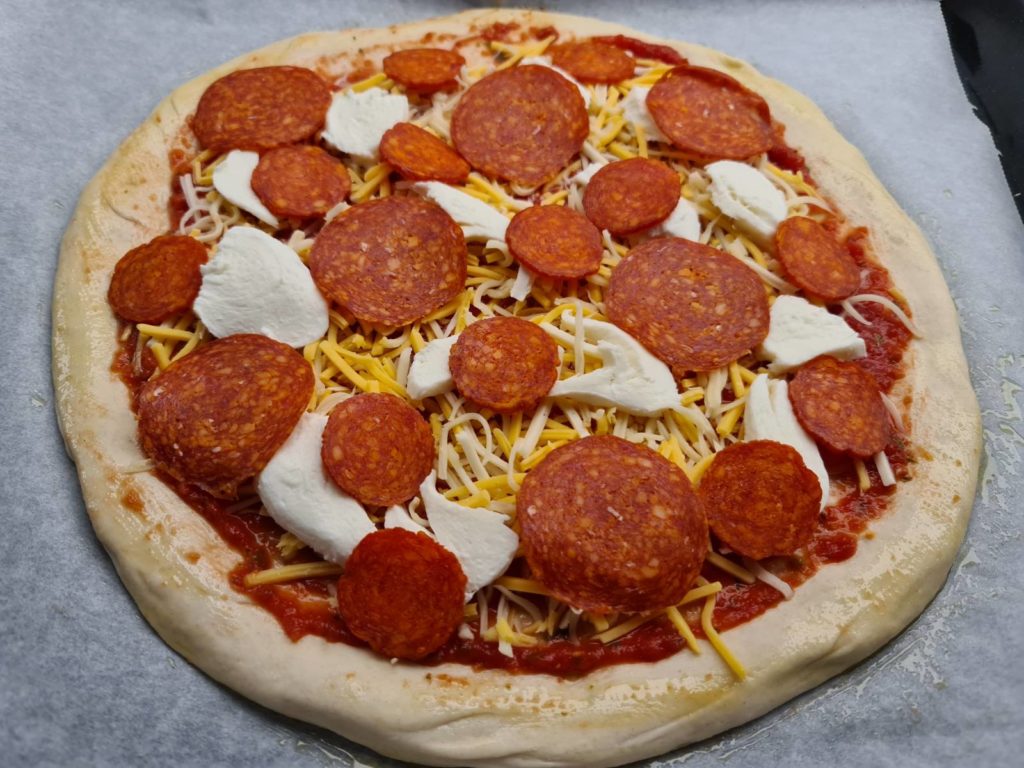
7. Topping the pizza (garnishing)
Time for the fun part! You can top your pizza with whatever you like. Be experimental and have some fun. But don’t add too much, because then it will take longer to bake the pizza, and you’ll end up with a dry crust.
The way you top a pizza is first sauces, then cheese, and lastly toppings.
- Sauces
- Cheese
- Toppings
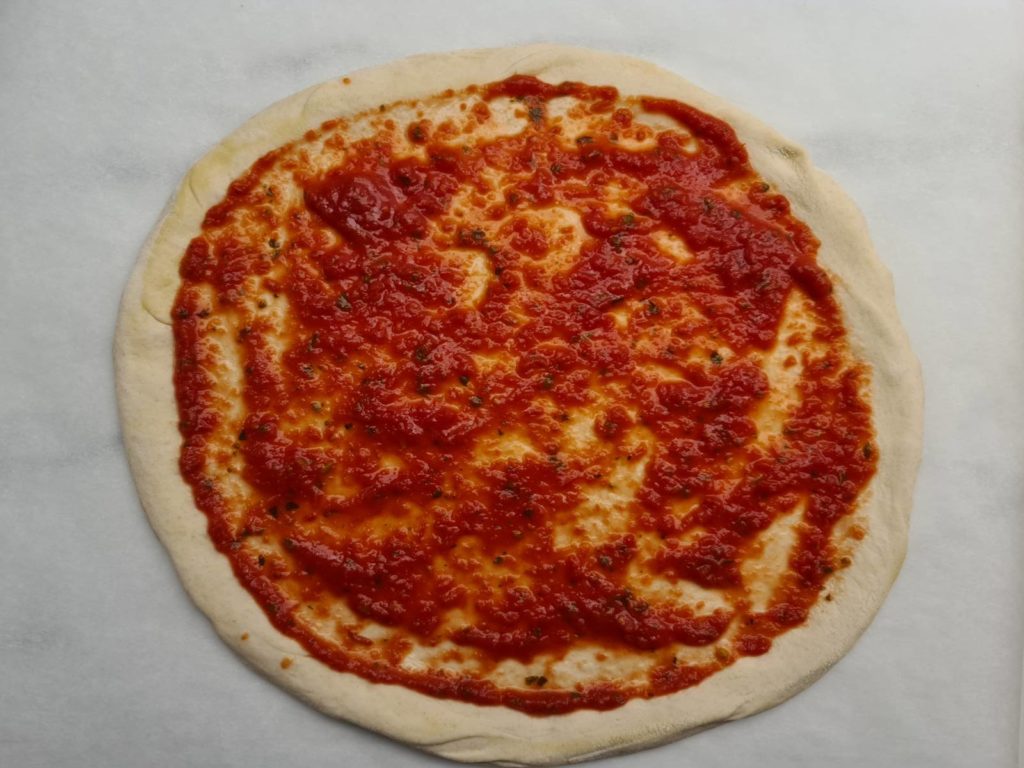
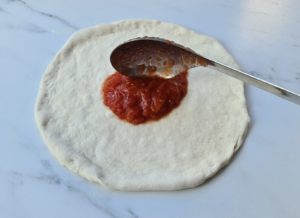
7.1 Sauce
You can use any sauce you like. I will not cover sauce in this recipe, as it’s all about the dough. But you can check out an easy Neapolitan pizza sauce you can make in less than 5 minutes here.
Simply spread 2-3 large spoons of sauce evenly throughout the pizza base. But try to avoid the rim.
7.2 Cheese
Next, add cheese. Mozzarella is a great choice!
7.3 Toppings
Lastly, add toppings. Spread the toppings of your choice evenly across the pizza.
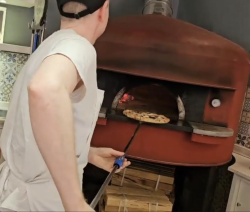
8. Baking
8.1 Preheating
Preheat your oven to 500°F (260°C). If your oven doesn’t go that high, just set it to the hottest setting, and let the pizza bake a little longer.
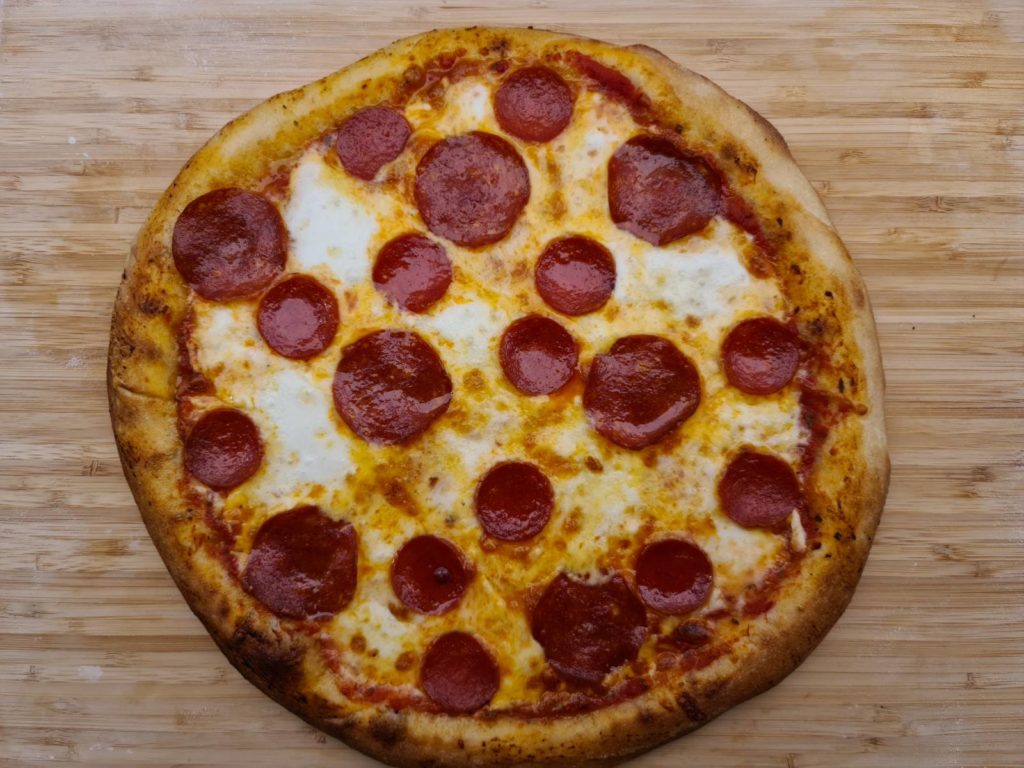
8.2 Bake the pizza
Place the baking sheet with the pizza in the middle of the hot oven, and let the pizza bake for 10-12 minutes. It’s done when the cheese is melted and the crust is crispy and slightly brown.
Don’t take it out too soon. That’s one of the most common mistakes people make when baking pizza at home! The crust should have some color. It will both taste better and have a nice texture.
When it’s done, take the pizza out of the oven, let it rest for a minute to let the melted cheese set a bit, before you cut and serve it.
Why pizza should be baked in a hot oven
You should bake pizza in a hot oven because you want it to bake faster. Baking the pizza hotter and faster gives a better oven spring and a lighter crust. It also creates a crispier crust without drying out the center. So you will end up with a decadent crust that’s crunchy on the outside but has a soft and light interior.

Basic pizza dough
Equipment
- Kitchen scale
- Mixinb bowl
- Oven with baking sheet
Ingredients
- 700 g four
- 450 g water room temperature
- 15 g salt
- 7 g active dry yeast
Instructions
Mixing ingredients
- Measure all the ingredeints using a kitchen scale.
- Add the salt and room temperature water to a mixing bowl, and stir to dissolve the salt.
- Add around 10% of the flour to the bowl, and mix with your hand or whisk until you get the worst lumps out.
- Add the yeast and dissolve it. Next, add the remaining flour gradually while mixing. Until it’s all combined into a shaggy dough.
Knead the pizza dough
- Fold the dough over itself a couple of times, and knead it by hand for 15 minutes. (Optionally use a stand mixer with a dough hook)
Portioning the pizza dough
- Split the dough into three equal-size dough balls at around 390g each.
- Lightly grease 3 bowls with oi, place the dough inside and, cover with plastic wrap.
Stretching the pizza dough
- Prepare a small pile of flour on your countertop and place one of the dough balls in the flour. Press the middle of the dough ball using the palms of your hand, but make sure to leave a rim around the edge. Keep working until you have a 12-inch pizza base.
- Move the pizza to a baking sheet and do any final shaping
Topping the pizza
- Add tomato sauce, cheese, and toppings to the pizza. But don't add too much.
Baking the pizza
- Preheat your oven to 500°F (260°C). If your oven doesn't get that hot, set it at the highest setting.
- Place the baking sheet with the pizza in the middle of the oven, and bake for 10-12 minutes, until the cheese is melted and the crust is slightly brown.
Related

- Neapolitan Pizza Dough Planner - June 7, 2026
- Is Your Pizza Dough Too Dry? Here is How to fix it! - June 10, 2024
- The Ultimate Guide to the Pizza Dough Windowpane Test - June 8, 2024
Hi,I just copied your basic pizza recipe but I find there is no mention of the 4 hours bulk fermentation.
There is some mention in main description on your site but in the actual recipe it is missing.
I am “kneading” to make this dough today so I will just bulk ferment for 4 hours before balling up.
kind regards
Wayne
Hi, this is supposed to be a fast and easy recipe without bulk fermentation 🙂
Andreas
This was my first attempt at making a pizza from scratch. I bought a stone, a peel and all of the recommended ingredients. I followed the recipe exact but when it came time to move the pizza from the countertop to the peel to go to the oven the entire thing collapsed. The crust wasn’t strong enough to be moved. I put very little sauce and cheese on it. What did I do wrong? This was an expensive mistake that ended up in the garbage.
I’m really sorry to hear that!
What kind of flour did you use?
It sounds like the dough needed more kneading to develop the gluten to make it stronger, or that it was over-fermented.
Next time, you can also try to top the pizza on parchment paper, then use the peel to move the pizza on the paper. That should prevent the pizza from collapsing. Just remember to remove the parchment paper from the oven after 2-3 minutes (when the pizza has sat a bit) if you’re baking on a hot pizza stone.
I’ve stopped buying pre-made pizza dough since it’s gotten ridiculously expensive for basically some flour & water and started making my own, but my crust has been too dense, probably because of too much flour, so I’m going to try your recipe, but one question – I only need one crust at a time since I live alone, so what’s the best way to store the others until I use them? I do like the idea of having extras on hand, so just dividing the ingredients isn’t an option. Thanks.
If you’re planning to use the dough within a couple of days, you can store it in the fridge. Otherwise, you can freeze the dough for a few months. Here is some more information on how to store pizza dough that you’ll probably find useful: thepizzaheaven.com/how-to-store-pizza-dough
You can also scale the dough if you don’t want to make as many pizzas.