What is the best way to stretch Neapolitan pizza dough? Stretching and shaping your pizza is one of the most challenging aspects of making Neapolitan pizza. And if it’s not done correctly, you may wind up with a dense and unappealing pizza, despite starting from the perfect dough. But with the right method, you will soon roll out perfect Neapolitan pizzas every time!
When making Neapolitan pizza, the goal is to achieve a light, open crust that’s crunchy on the outside yet soft on the inside. Using high-quality ingredients, following a good recipe, and a long slow fermentation is important, but without knowledge of how to stretch your pizza dough, the final result will be a letdown.
In this article, I will take a closer look at different methods to stretch Neapolitan pizza dough, their benefits and drawbacks, and how to stretch Neapolitan pizza the right way, so you can make the perfect crust every time!
What to think about when stretching Neapolitan pizza
There are dozens of techniques for stretching pizza dough, but not every method is suitable for every time of pizza.
The Neapolitan pizza is thin, even, and round. It has a light and open crust. It’s a personal-sized pizza, typically measuring 10-14 inches (25-35 cm) in diameter. So keep that in mind when evaluating the best way to stretch Neapolitan pizza.
Preserving air bubbles to create a light, open crust
One of the things that set Neapolitan pizza apart is the light and open crust. It’s crunchy on the outside, yet soft on the inside. To create the perfect Neapolitan pizza crust, you need a well-fermented dough with proper gluten development. You need to bake your pizza fast at a high temperature (800-900F, 420-480C).
To create this lovely, light crust your dough needs to have small air bubbles in the rim that can puff up during baking. Small pockets are created during kneading, and when you leave your dough to ferment, gasses from the yeast will fill these pockets and create small bubbles inside your dough. But in order for your crust to puff up in the oven, you need to preserve these bubbles when stretching the dough.
Preserving the air bubbles in the rim is one of the most important aspects to create the perfect Neapolitan pizza crust. And to do that, you need to gently stretch your pizza dough so you don’t press out the air bubbles.
Allow the pizza to be stretched thin, even, and round
A Neapolitan pizza should also have a thin, even base. To stretch your pizza thin you need sufficient gluten development. To get the right gluten strength, you have to use medium-high protein flour to make your dough. You also need to make sure to knead the dough to form a strong gluten network, so your dough doesn’t tear.
Proper gluten development will give you a soft and extensible dough, that you can stretch thin without tearing it.
Remove flour
When stretching your pizza, you also want to make sure you get rid of any excess flour, since this will burn in the oven and create bad flavors.
Pick a method that works on small pizzas
Neapolitan pizza is personal-sized, at around 10-14 inches (25-35 cm), so you should use a stretching method that’s suitable for smaller pizzas.
Since Neapolitan pizzas are typically personal-sized, with one pizza served per person, it’s beneficial to use a quick stretching method, as you’ll likely need to make more pizzas compared to baking family-sized pies.
Methods for stretching Neapolitan pizza dough
There are many ways to stretch pizza dough, here are the most common techniques for stretching Neapolitan pizza.
The Neapolitan slap (Schiaffo)
The Neapolitan slap (Schiaffo in Italian), also referred to as the “Stretch and slap” method is the traditional way to stretch Neapolitan pizza. It’s impressive to see an experienced pizzaiolo performing this technique and rolling out perfect pizzas in seconds.
It’s a pizza stretching method where you hold the dough with one hand and gently pull it outwards to stretch it, followed by folding the dough over your forearm before slapping it back on the work surface.
Some of the benefits of the Neapolitan slap are the speed, that it’s easy to make thin, round, and even pizzas, and that it preserves air bubbles in the edge, allowing the crust to puff up in the oven.
The Neapolitan slap is the fastest way to stretch pizza when you master the technique. It also naturally creates a flat even base and preserves air bubbles in the rim.
The main drawback of the Neapolitan slap is that it requires skill and experience to fully master the technique. It also requires well-relaxed dough balls, and it’s challenging to use the technique on larger pizzas (more than 14-15 inches), making the Neapolitan slap mostly suitable only for Neapolitan-style pizza.
The Press and stretch method – for beginners
A more beginner-friendly method for stretching Neapolitan pizza dough is the press and stretch method.
When using the Press and Stretch method, you start by pressing the dough with your fingertips, pushing from the center outwards while rotating the dough. Then, you gently lift and stretch the dough using the back of your hands, maintaining an even thickness throughout.
If you’re new to stretching Neapolitan pizza, I recommend heading over to my step-by-step guide to the Press and stretch method.
The main benefits of the Press and Stretch method are that it’s easy to learn and beginner-friendly. It’s also a gentle method that reduces the risk of tearing compared to some other pizza stretching methods.
Some of the drawbacks of the Press and Stretch method are that it’s slower, it’s hard to make a perfectly even pizza, and it doesn’t preserve air bubbles in the edge as well as the Neapolitan slap.
The Press and Stretch method is slower than the Neapolitan slap. This is not necessarily a problem in a home-baking setting, but with many hungry guests, it’s not ideal.
You also run the risk of losing some of the air bubbles in the rim compared to the Neapolitan slap, resulting in less oven spring and a less light and open crust.
What is the best way to stretch Neapolitan pizza?
The best way to stretch Neapolitan pizza is by using the Neapolitan slap method. When you master the technique, it’s the fastest way to stretch pizza and makes it easy to create a perfectly round and even pizza with a raised edge. Additionally, it preserves the air bubbles in the crust, allowing it to puff up in the oven and create a light and airy crust.
In the next section, we will go through how to stretch Neapolitan pizza step-by-step, so you can make the perfect crust!
Stretching Neapolitan pizza dough using the Neapolitan slap: step-by-step
In this section, we will go through the steps to perfectly stretch your pizza using the Neapolitan slap method.
The 6-step process to stretch Neapolitan pizza
Stretching Neapolitan pizza using the Neapolitan slap consists of 6 steps:
- Initial shaping of the dough to make sure you start from a round, even dough ball
- Flouring the dough to prevent it from sticking
- Opening the dough to create an even bottom and rim on your pizza
- Stretch and slap to stretch out and shape the pizza
- Topping the pizza
- Final stretch and adjustments on the peel to make the perfect pizza
Prerequisite
Before stretching your pizza you will need well-relaxed (at least 4-6 hours) dough balls of 200-280g (7-10 oz).
You can find a recipe here: Authentic Neapolitan pizza dough recipe.
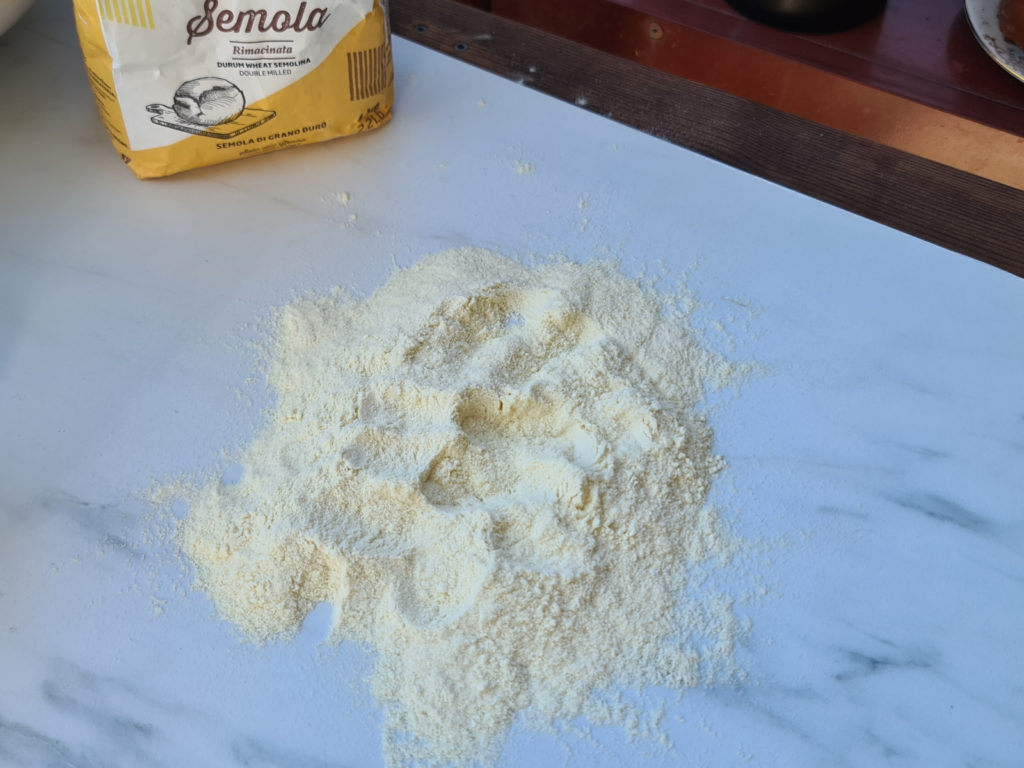
You also need flour to prevent the dough from sticking when stretching your pizza. The best option is semolina because it’s coarse and can handle the heat from the hot oven without burning.
A pizza spatula is also useful to handle the dough.
Preparations
Prepare a small pile of flour on your working surface and get your dough ready.
1. Initial shaping
Get your dough out from your rising container and place it in the pile of flour. Next, make sure your dough is round and even. A round, even dough, will make a round, even pizza.
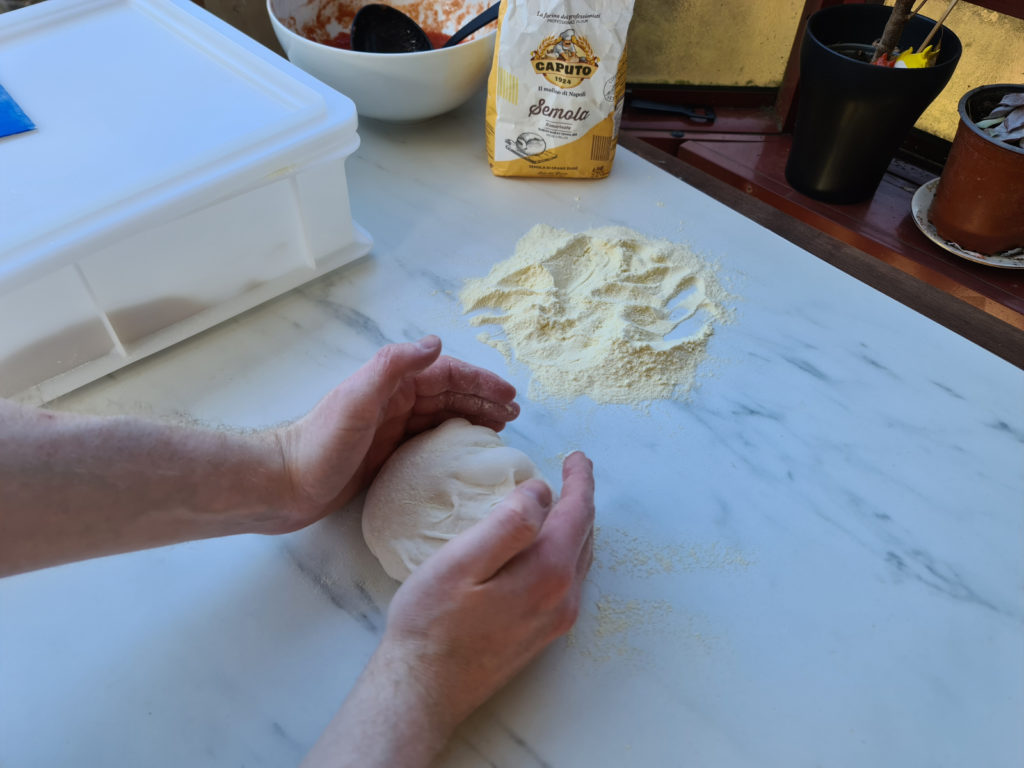
2. Flour the dough
Next, flour your dough by covering all sides of the dough in the flour to make sure it doesn’t stick to your hands or working surface when stretching.
3. Open the dough
Next, it’s time to open the dough. Press the middle of your dough flat and make a 1/2-inch (1cm) rim that will be your crust.
Start by pressing around 1/2 inch (1 cm) from the bottom of the dough using flat fingers, and work your way upwards until you’re 1/2 inch from the other edge. Make sure to leave a rim on your pizza so it can puff up to create a nice crust.
Turn the dough and repeat.

4. Stretch and slap
Time to stretch and slap.
Start by holding the dough in place using one hand, then grab inside the rim using your other hand and gently pull outwards. How far you can stretch depends on how well the gluten is developed and how relaxed it is. Then, fold it over your forearm, and slap it down on the working surface to rotate the pizza.
Repeat this until your dough has reached around 80% of the final diameter. If you want to make a 12-inch pizza, stretch it to 10 inches using the stretch and slap.
5. Top your pizza
Next, add sauce cheese, and topping to your pizza, before transferring it to your peel.
6. Final stretch and adjustments on the peel
Stretch the pizza out to its full size, and make any final adjustments to ensure your pizza has the perfect shape.
Common problems when stretching Neapolitan pizza dough
Here are some of the most common problems when stretching Neapolitan pizza dough and how to fix them.
The dough is tearing
Tearing happens when your dough lacks gluten development. The two main reasons for the lack of gluten development are using low-gluten flour and not kneading the dough enough. It also happens if you over-proof your dough by leaving it to rise for too long.
Read more here: Why pizza dough is tearing when stretching.
The dough is too elastic and springs back
If your dough just springs back while stretching it, the most common cause is that the gluten is too tight. Gluten gets tight when you knead the dough, so you need to let the dough relax before stretching. It also gets tight when the dough is cold, so if you could ferment your pizza dough, you need to let it come to temperature to get stretchier.
Too much gluten and over-kneading can also result in a dough that’s very hard to stretch.
Read more here: Why your pizza dough is hard to stretch.
The dough is too sticky
Sticky dough is frustrating. so make sure to use enough flour when stretching the dough.
Your dough also gets sticky when you make high-hydration dough (more water compared to flour). High-hydration dough can make an amazing light and fluffy pizza crust, but it’s hard to handle. So before you’ve mastered basic stretching, stick to lower hydration dough. Around 60% is a great starting point.
More tips to improve your pizza dough stretching
Here are more tips to help you stretch your pizza dough with ease: 11 amazing stretching pizza dough tips to improve your pizza.
- Neapolitan Pizza Dough Planner - June 7, 2026
- Is Your Pizza Dough Too Dry? Here is How to fix it! - June 10, 2024
- The Ultimate Guide to the Pizza Dough Windowpane Test - June 8, 2024