How to use a pizza stone for the first time is one of the questions I’ve been asked the most, I have therefore put together this complete guide, so you can make perfect pizza on your new pizza stone!
What is a Pizza Stone?
A pizza stone is a portable baking surface for a home oven. It’s most commonly made from clay, ceramic, or cordierite to imitate the hot floor of a
Why Do You Need a Pizza Stone?
If you don’t already own a pizza stone, do you really need one?
A pizza stone is one of the most useful tools for pizza baking at home, and it has revolutionized my pizza baking. The main purpose of a pizza stone is to bake the pizza with direct contact, to get a crispy pizza, that you normally can’t achieve in a convection oven.
Who Needs a Pizza Stone?
Honestly, I think everyone needs a pizza stone. It will dramatically improve your pizza, and it’s also inexpensive to acquire. A cheap pizza stone can run as low as 10 or 15 dollars, so even if you just use it a few times, it doesn’t make your pizza much more expensive. But I strongly believe that it will revolutionize your pizza baking too. When you’ve tried making Neapolitan on a pizza stone, you don’t want to go back!
How A Pizza Stone Works
The goal of a pizza stone is to simulate a
What A Pizza Stone Is Trying to Achieve
What a pizza stone is trying to achieve is the same baking as in a
The main difference between a convection oven, that’s what you’ll find in most kitchens, and a
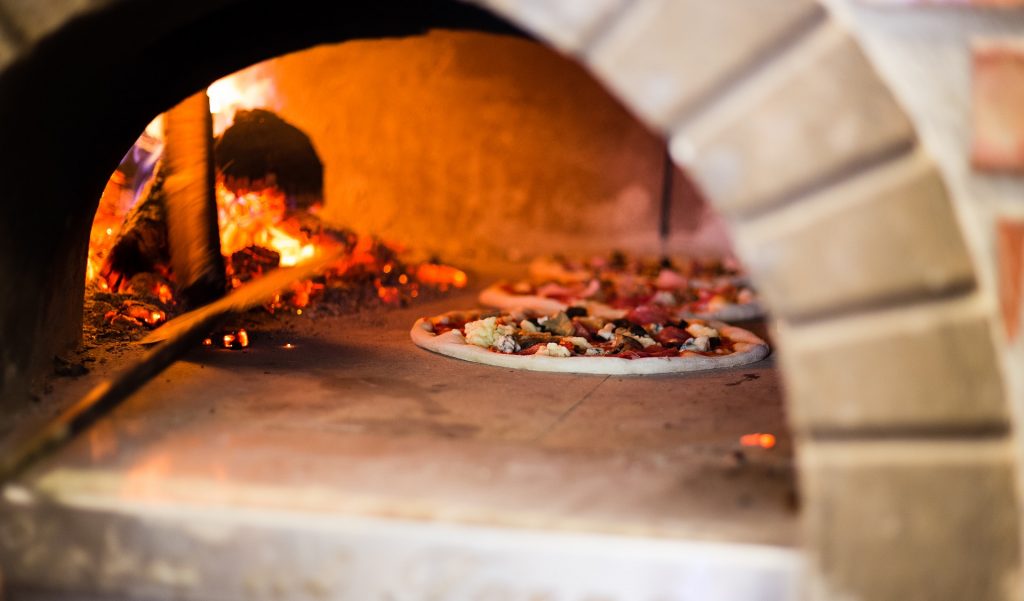
We can’t do that much about the temperature of the oven (though I have a couple of tricks if you keep reading), but what we’re really trying to do with a pizza stone is to imitate the hot floor of a
Baking directly on a hot surface will make a much crispier pizza than what we normally can achieve in a home oven. The main reason is the heat, but also the pizza stone’s ability to absorb moisture will help the pizza get crispy.
What You Need to Use a Pizza Stone for the First Time
Tools
Obviously, you’ll need a pizza stone, but in addition to that, there are a couple of more things that are useful to have.
Something to Place the Pizza Stone On
The first thing you need (in addition to an oven, of course!) is something to place the stone on in the oven. A baking sheet or rack works well. If you have a very heavy pizza stone, it might need some extra support to handle the weight, but for most pizza stones this isn’t anything you need to worry about. I’ll come back to where in the oven you should place the stone later.
A Pizza Peel
You can’t bake pizza on a pizza stone without a
If you want to know more about pizza peels, check out our article Pizza Peels: Everything You Need To Know.

An Infrared Thermometer (Optional)
An infrared thermometer can be nice to have to check the surface temperature of the pizza stone. For a wood-fired
What Kind of Pizza Is Best for Pizza Stones?
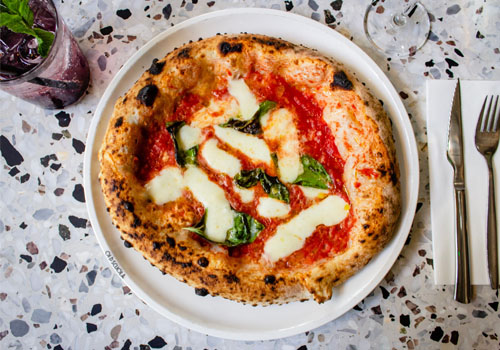
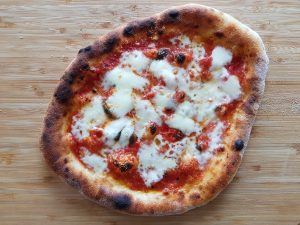
You can bake any kind of pizza on a pizza stone, but my recommendation is to try Neapolitan-style pizza. This is where a pizza stone really shines!
Using a thin pizza is going to make the process a lot easier than a thick pizza. The reason is that a thin crust is going to bake quicker, and will therefore result in a crispier pizza! A Neapolitan-style pizza also doesn’t have that much sauce, cheese, and toppings. One of the benefits of this is that it’s easier to get a lightweight pizza on and off the
Pizza Dough for Pizza Stone
You’ll need a pizza dough for your pizza stone pizza. You can use whatever pizza dough you’ll like, but I recommend trying Neapolitan-style pizza. We have an easy recipe that I use all the time: Authentic Neapolitan Pizza Recipe.
Pizza Sauce
If you’re going for a Neapolitan-style pizza, you should also go for Neapolitan pizza sauce. It’s delicious, super simple, and contains only four ingredients. It can also be made in less than 5 minutes. Check out the recipe here.
Inspect the Pizza Stone to Make Sure It’s in Good Condition
The first thing you should do when you get a new pizza stone is to inspect it to make sure it doesn’t have any cracks. Especially cheap pizza stones tend to crack easily, and sometimes come in bad condition. It’s therefore important to check the stone thoroughly before you start using it.
Where In The Oven Should You Place The Pizza Stone?
Where to place the pizza stone is debatable. Most people would recommend putting it in the bottom wrack of the oven. But after some experimenting to find the best method, I found a better way!
When you’re baking pizza on a pizza stone, the challenge is to make the bottom and the top of the pizza bake fast but also to bake at the same rate. You don’t want a burnt pizza with unmelted cheese. Likewise, you don’t want a pizza with burnt salami and raw crust.
Close to the Broiler
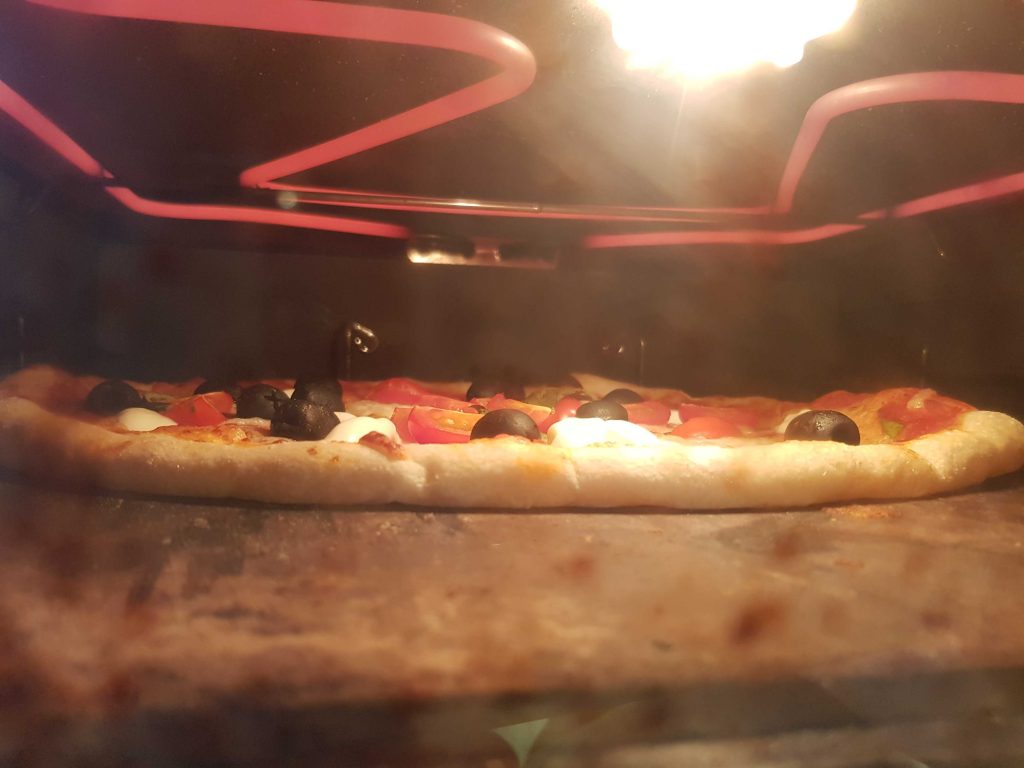
Most ovens have a broiler or grill function, and I strongly recommend using that when you’re baking pizza. The broiler is a heating element that provides extra high heat. It’s usually located at the very top of the oven. The reason I recommend using the broiler for baking pizza is the extra heat it provides. This will help bake the pizza quickly, melt the cheese, and char the crust, just like a proper wood-fired oven!
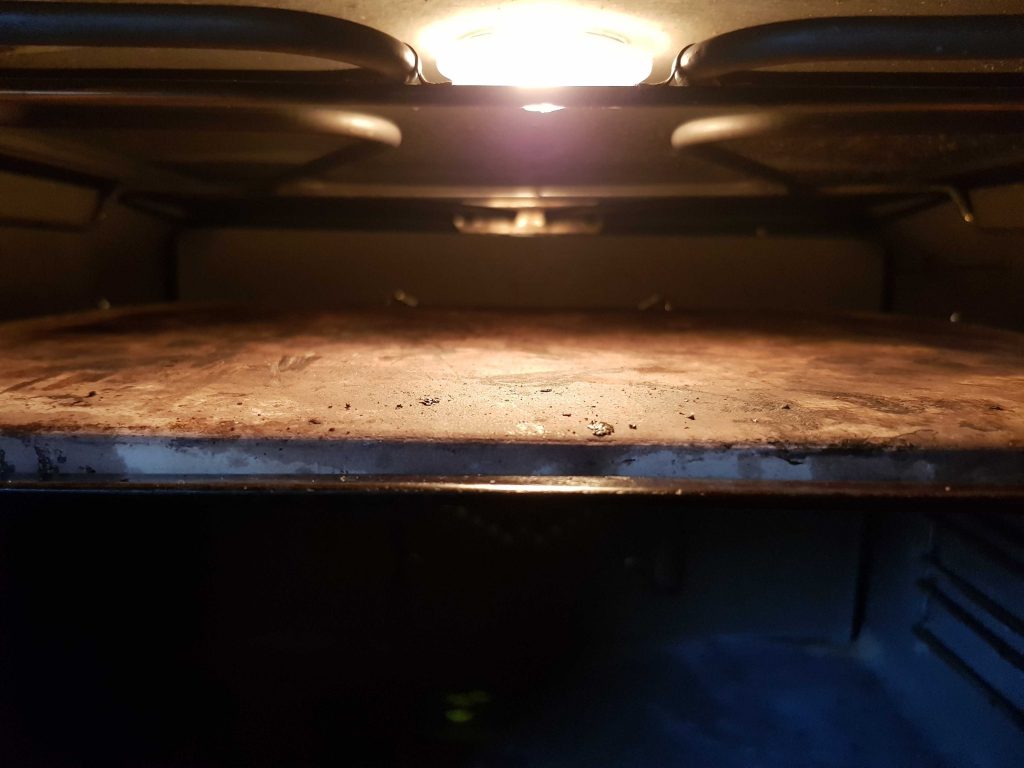
To take advantage of the broiler, you need to place the pizza stone as close to the broiler as possible. This means that you want to place the pizza stone on the top rack.
If you don’t have a broiler in your oven, I recommend placing the stone in the middle, for even baking of both the top and bottom of the pizza.
How to Avoid the Pizza From Sticking to the Pizza Stone
A concern for many new pizza enthusiasts is that the pizza will stick to the pizza stone. But contrary to what most people believe, sticking to the pizza stone during baking is not a problem if you’re using your stone correctly.
Don’t Use Parchment Paper
You should never use parchment paper on a hot pizza stone. The reason is that most types of parchment paper can only handle 430°F (220°C). To make crispy pizza our oven should be hotter than that!
If you use parchment paper in higher temperatures than what’s recommended it will turn into coal, or worse, catch fire (I’m talking from personal experience here… check this article if you want to read about that horrible experience). I don’t recommend reducing the heat to a safe level, since the pizza will not bake properly at 430°F (220°C). You should therefore avoid parchment paper on your pizza stone.
Don’t Use Cornmeal
Another common method to avoid sticking is to sprinkle cornmeal on the pizza stone. I would also avoid that because cornmeal can also burn on a hot pizza stone. In addition to that, it also adds flavor and texture to the pizza crust, that you might not want (especially for a Neapolitan pizza).
The Right Way!
I’ve seen people use all kinds of methods to avoid sticking, including the two things mentioned above (parchment paper and cornmeal). But all those people are trying to solve a problem that doesn’t even exist!
The Stone Has to Be Hot
The most common problem is that the pizza stone is not hot enough. If the stone is properly heated, the crust will get crispy during baking and not stick to the pizza stone. That means that if you’re struggling with sticking the pizza stone, you need to turn up the temperature. You really want the pizza stone to be as hot as your oven allows.
Use Proper Dough that Doesn’t Tear
Even if the oven is hot enough, the pizza can stick to the stone if the pizza dough has holes. A common problem is that sauce and toppings are leaking and burning. This usually happens if your pizza crust is too thin, and it rips. Probably you’re using bad dough!
To get an elastic dough that doesn’t tear, you should have a good, high-gluten pizza flour (ideally around 12% protein). I recommend using Caputo’s pizza flours, and especially Caputo Pizzeria (read more about Caputo and their flours here). Secondly, you need to knead the dough sufficiently, to make sure the gluten gets strong. The dough needs at least 15-20 minutes of kneading to get the right consistency. To fully understand how to prevent tearing, I recommend checking out my complete guide on the topic here.

Don’t Overtop The Pizza
You should also try to avoid adding too much sauce, cheese, and toppings to your pizza. This will not necessarily make the pizza stick, but it will increase the baking time. If you attempt to remove the pizza from the oven before it’s done, it can stick to the pizza stone. The reason overtopping increases the baking time is that to get crispy, the water in the pizza has to evaporate first. And all the added toppings will also add more water to the pizza.
Clean Your New Pizza Stone Before You Use It for the First Time
If you haven’t used the pizza stone before, you should clean it before use. You do that by wiping it with a wet cloth and using warm water. You should never soak the pizza stone in water! The reason is that the stone will absorb the water, and as a result, it can crack. You should also not use any soap on the pizza stone, because it will also absorb the soap. The last thing you want is soap-tasting pizza!
Preheat the Pizza Stone
The most common mistake I see people make when they’re baking pizza on a pizza stone is to not preheat the stone. It’s critical to preheat the pizza stone to get crispy, nice pizza. So don’t make the same mistake!
Why You Need to Preheat Your Pizza Stone
There are two reasons why you need to preheat the pizza stone: the stone needs to be hot enough to bake the pizza, and the stone has to come to temperature slowly to prevent cracking.
The first reason you need to preheat the stone is that it takes time to reach the temperature. Depending on how thick your pizza stone is it may take anywhere from 45 minutes to more than an hour. I experimented with a thin (1/2 inch, 1.3 cm) pizza stone, and found that it took around 45 minutes to preheat. You can read the test here. If you have a thicker pizza stone, I recommend giving it at least an hour. In conclusion, let the pizza stone preheat for at least 45 minutes to 1 hour.
The second reason is that the pizza stone is more likely to crack if you place it in a hot oven. This is because most pizza stones are made from clay or ceramic, and both are fairly brittle materials. The most common reason for cracking is thermal shock. This occurs when the pizza stone is exposed to sudden, huge changes in temperature. The difference between the room temperature and the
Temperature
You want the stone and the oven to be as hot as possible. You should therefore use the highest temperature setting for your oven.
How to Preheat Your Pizza Stone
Place the pizza stone in a cold oven, and turn it on to the highest setting. Then, leave the stone to preheat for at least 45 minutes to 1 hour. If you have a broiler in your oven, I also recommend turning that on to make the pizza stone really hot. I usually let turn on the broiler after around 15 minutes, to avoid thermal shock.
If you want to learn more about how to preheat your pizza stone, check out this article.
Transfer the Pizza From the Countertop to the Oven
The next step is to move the pizza from your countertop to the pizza stone for baking. This might actually be the most challenging part of the whole process. And personally, I’ve messed up countless pizzas trying to get them into the oven. But don’t worry, I’m going to take you through it, so you don’t make the same mistakes.
Get Your Pizza Ready
Before you attempt baking anything, you should have a pizza ready. If you don’t already have that, go to our Authentic Neapolitan Pizza Recipe first, and then come back here. I recommend preparing the pizza directly on the counter, you’ll learn why in the next section.
Great! You have an awesome pizza ready for baking!
Move the Pizza to the Pizza Peel
The first step is to move the pizza from the counter to the
It’s pretty common to assemble the
By assembling the pizza on your working surface, you’ll make sure that the time on the peel is minimized. It’s then much more unlikely to get stuck.
Dust the Pizza Peel
The first thing you should do is to dust the
An alternative is using cornmeal instead of semolina. However, cornmeal tends to burn more on the pizza stone, in addition to adding flavor and texture to the crust. I, therefore, stick to the more traditional semolina.
Move the Pizza Onto the Pizza Peel
Next, drag the pizza onto the dusted
Just grab the dough with both hands and slide it. If it’s sticking, you can use a pizza scraper or spatula to loosen the dough. It’s a good idea to add a light dusting of flour where the dough sticks to the working surface.
The pizza may not look super pretty when you get it over to the peel. Simply make the final adjustments not, before you pop it in the oven.
Slide the Pizza Onto the Pizza Stone
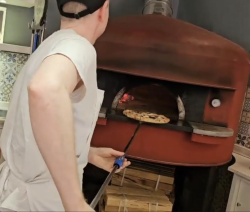
The final step is to slide the pizza off the
It’s not that hard. All you need to do is position the peel at a slight angle on the very back of the stone. Let it down and quickly slide it out, leaving the pizza on the stone.
Practice makes perfect, so before you use the pizza stone for the first time, it can be a good idea to practice. You can do that by sliding a damp towel off the
Baking The Pizza
How long you need to bake the pizza depends on how hot your oven is, and how thick the pizza crust is.
How Long Does It Take to Bake Pizza on a Pizza Stone
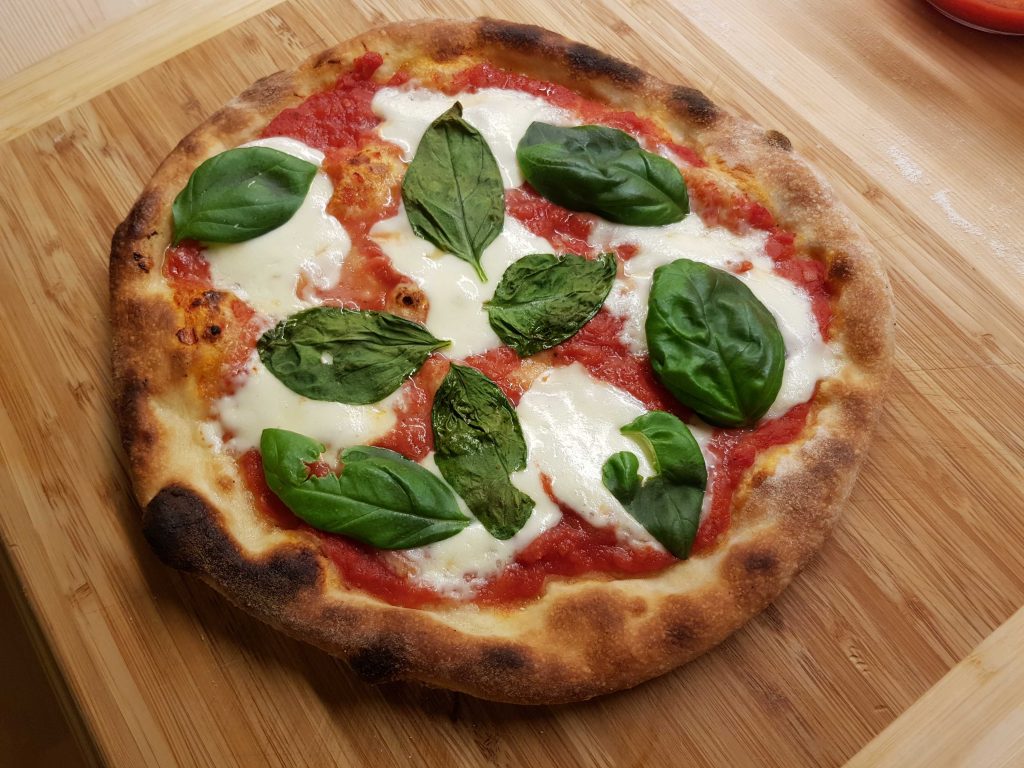
At the highest temperature, most ovens should bake a Neapolitan-style pizza in 5-6 minutes. You know the pizza is done when the cheese is melted, the crust has started to brown and ideally is slightly charred. You should also check the bottom of the pizza, lifting it with your peel. The bottom should also be crispy, and slightly browned.
Reheating Your Pizza Stone
If you’re baking many consecutive pizzas, you should also reheat the pizza stone between every 2 pizzas. The temperature of the stone will drop when you add a cold (room temperature) pizza, and will therefore not be hot enough to make more than 2 crispy pizzas right after each other. Then each pizza will get a little less crispy. I, therefore, recommend letting the stone reheat for 10-15 minutes after you’ve baked two pizzas.
A trick to avoid cooling the pizza stone is to place each consecutive pizza on the opposite side of the stone. So the other side of the stone can reheat while you’re baking pizza. This does however require a large pizza stone.
How to Bake Even Better Pizza on Your Pizza Stone
A trick a friend of mine taught me a while ago is to turn off the broiler and turn down the oven temperature a few minutes before you’re ready to bake the pizza. And then crank it back up with the broiler on, right after you add the pizza. What this will do is to make sure the broiler is on as much as possible during baking.
Usually, when you bake pizza with the broiler on, it’s only on for a few seconds at a time, because the oven is already hot enough. By reducing the temperature by 50-100°F (25-50°C), the broiler will stay one, providing more heat for baking and charring the pizza. The pizza stone retains heat so well that, reducing the heat a little bit will not affect the baking much.
Another thing you can do to improve the baking is try to get the pizza stone even closer to the broiler than the top rack. One thing you can do is place the stone on top of an upside-down deep baking sheet. This can probably get you an inch closer to the broiler. The more heat you can get, the closer you’ll be to the result of a proper
Cleaning and Maintaining Your Pizza Stone
Prevent Cracking
Probably the number one concern amongst pizza stone owners (and rightly so!) is that the stone will crack. I have already touched on the topic, but clay and ceramic, which most pizza stones are made of, are brittle materials. Therefore they are extra prone to cracking due to thermal shock. But if you avoid these mistakes, you’ll be fine!
Avoid Thermal Shock
Thermal Shock can happen when you have a rapid change of temperature. And if there is any kind of weakness in the pizza stone it can crack. Thermal shocks can happen if you place a cold pizza stone in a hot oven. Or if you take a hot pizza stone out of the oven. It can also happen if you place cold food on the pizza stone. So what you want to do is to avoid huge temperature changes. Let the pizza stone heat up with the oven, and leave it to cool down with the oven when you’re done using it.
Avoid Dropping It, Hitting It, or Apply Unnecessary Pressure
Since the stone is brittle it can also easily crack from dropping it. I have also experienced that my pizza stone cracked because I hit it too hard with my
If you want to learn more about cracking and how to avoid it, check out this article.
Should You Oil a Pizza Stone?
The short answer is no, you shouldn’t oil your pizza stone. Most pizza stone manufacturers, recommend you to not season your pizza stone with any oil. The reason is that, unlike a cast iron skillet, it’s not necessary to add a protective layer to the stone. Sticking should also not be a problem if the pizza stone is hot enough.
If you apply oil to the stone, it will be absorbed, something that can result in bad odors and smoking. If you want to read more about why you shouldn’t season your pizza stone, check this article.
Pizza stones come ready to use, and there is nothing you need to do, besides washing them with warm water (no soap!) and dry them properly before use.
Cleaning Your Pizza Stone
After you’re done baking pizza, it’s time to clean the pizza stone. Pizza stones tend to get pretty dirty, everything from pizza sauce to melted cheese and salami fat. Sometimes larger things like pieces of dough also stick to the stone and burn.
The first thing you need to do (and this is important) is to let the stone cool completely before you attempt to clean it. This might take a few hours, so I usually leave my pizza stone in the oven overnight. Cleaning a hot pizza stone can be extremely dangerous. And in addition to hurting yourself, you can easily crack the stone.
A pizza stone will develop a patina over time, meaning it will get a darker color with use. Don’t worry about that, it’s completely natural and doesn’t mean you didn’t clean the stone properly.
Remove Any Large, Burnt Pieces
I recommend starting with scraping off any large pieces with a pizza dough scraper or a spatula. The larger pieces may require a little bit of power, but be careful not to add so much pressure that your stone cracks.
If that’s not enough, you can use steel wool or something like EarthStone Cleaning Block (affiliate link) to clean the stone.
Clean With the Pizza Stone With Warm Water
Next, clean the stone with warm water. As mentioned above, you should never soak the stone in water or use soap on your pizza stone. Don’t leave it under running water in the sink. You should also never put it in the dishwasher!
I recommend starting with a nylon brush, to get the worst parts, then finishing off with a wet cloth.
Dry the Pizza Stone
When the stone is clean and nice, you should wipe off any water with a cloth, or paper towel. Then let the stone air-dry until it’s completely dry.
Conclusion
Now you know everything about how to use a pizza stone for the first time, and you should be well on your way to making awesome pizza at home! I know this is a long article, and it might take a couple of tries to fully master baking pizza on your new pizza stone.
The most important takeaway from this article is that you need to heat the pizza stone properly. To make crispy pizza, it’s essential to bake the pizza in a hot oven. The goal of a pizza stone is to create a hot surface that you bake your pizza on. And to do this you need to place the stone in a cold oven, and let it preheat with the oven for at least 45 minutes to 1 hour.
Related
- Neapolitan Pizza Dough Planner - June 7, 2026
- Is Your Pizza Dough Too Dry? Here is How to fix it! - June 10, 2024
- The Ultimate Guide to the Pizza Dough Windowpane Test - June 8, 2024
Excellent info. Thanks 👍🏻👍🏻👍🏻
Thanks for the tips – a lot more to using a stone than I thought!
Can i use pizza stone continously say for business?
I think you would be better off using a professional pizza oven if you want to make pizza in a restaurant setting. I think you can get a pizza stone-like floor for some types of professional electric pizza ovens. This article is more about small pizza stones for home use.
What to do while cleaning the pizza stone gets wet. Let say it has soaked water. How long we need to leave it for dry in air ,
Will it crack when I use it after drying. Should I dry in sun.
I would just leave it at room temperature to dry for a couple of hours or overnight to be sure it’s completely dry. But leaving it in the sun will probably speed up the process. If you try to bake on the pizza stone in a hot oven if water has penetrated into the stone, it can crack, So you should let it dry out completely before using it.
When do you put the pizza stone (in a pizza dome) on the wood fire?
Are you using a pizza stone in a wood-fired oven? I would add the stone before you start preheating the oven (light the fire) to prevent the stone form cracking from thermal shock.
Great article! I love the information and safe advice on pizza making. It’s seriously one of my favorite foods. 😋😋😋
The link for the “Never Use Parchment Paper on a Pizza Stone” is broken though. As it is, the link just takes readers to a image (https://thepizzaheaven.com/wp-content/uploads/2020/07/Never-use-Parchment-Paper-on-a-Pizza-Stone.jpg). However, after some sleuthing and deductive reasoning, I finally found the correct article & link (see below).
https://thepizzaheaven.com/Never-use-Parchment-Paper-on-a-Pizza-Stone/
Thank you for letting me know! I’ve fixed the link now 🙂
Can you use a pizza stone and make pizza on it in a BBQ?
Yes, you can! It’s just a bit harder to balance the temperature than in a regular oven.
Is it okay so place a frozen pizza on the pizza stone ? Or should I thaw it out first before placing it on the pre heated pizza stone ?
It should be okay to just place the frozen pizza directly on the stone.