Are you ready to learn the secret to the best Italian pizza crust you’ve ever tried? Cold fermented pizza dough is the ultimate way to improve texture and flavor. It might sound complicated but I promise, it’s simple!
I’ll teach you everything you need to know and give you my own recipe, that I’ve spent the last decade perfecting. This is how I make perfect Neapolitan-style, pizza every time!
For the most impatient readers, click here to jump to the recipe.

Just a little warning before we get started: making good pizza requires time. If you’re looking for a quick recipe to throw together some pizza for your guests who are there in an hour, this is not the right recipe.
Making amazing, flavorful Neapolitan-style pizza is easy, but it does require, quality ingredients, and giving the dough the love and time it deserves.
First of all, what is cold fermented pizza dough? What is cold fermentation? And why do you want to cold ferment your pizza dough?
What Is Cold Fermented Pizza Dough?
First of all, what is cold fermented pizza dough? What is cold fermentation? And why do you want to cold ferment your pizza dough?
What is Cold Fermentation?
Fermentation is a metabolic process that produces chemical changes in an organic substance. In other, and simpler, words, fermentation is the process of yeast eating carbohydrates and converting them to alcohol and carbon dioxide (CO2). This may sound complicated, but all you really need to know is that yeast turns sugars in the flour into gas. This is what inflates the dough, and makes it grow larger.
As a side effect of the fermentation process, the natural flavors of the flour will be enhanced, leaving you with more flavorful pizza dough!
If you’ve only typically tried fast-rise pizza dough, that doubles in size in 45 minutes, you may ask what are these complex flavors?
When most of the starch and sugars in the dough are consumed by the yeast, the resulting crust will develop a more complex flavor. This flavor is sometimes described as earthy and olive-like. And this takes time, the slower the process, the more flavorful the result.
The way you achieve this is by slowing down the fermentation process, allowing the yeast to take its time. You can do that by lowering the temperature. Lowering the temperature will slow down the pace at which yeast consumes sugars in the dough, creating these complex flavor compounds.
Balancing Rising and Fermentation
One thing worth mentioning is that even though the dough is fermenting, it doesn’t necessarily rise. The pizza dough can ferment and develop flavor even though it doesn’t rise.
This means you can make a very flavorful pizza crust that lacks a light texture with large air bubbles. You, therefore, need a balance between the development of flavor and the inflation of the dough for the best possible result. And fermenting your dough at the right temperature is an important part of the equation.
Cold Fermented Pizza Dough in the Fridge
To cold ferment your pizza dough, all you need to do is let the dough ferment in a cool environment, such as the fridge, instead of at room temperature.
The fridge is actually a little too cold for cold fermentation. The reason is that in the fridge the fermentation process slows down so much that the dough almost stops rising. This doesn’t mean you can’t make amazing cold fermented pizza in the fridge, it simply means you need to leave it longer.
Cold Fermented Pizza Dough in a Cool Environment
The optimal temperature, according to a skilled pizzaiolo I talked to in Naples, is around 59-64°F, or 15-18°C. But unfortunately, most of us don’t have commercial food storage space that keeps the right temperature. But you have a cool basement, that’s a great place to ferment your pizza dough. I have a cool storage room in my basement that says around the right temperature most of the year.
How Long Should You Cold Ferment Pizza Dough?
How long you should cold ferment the pizza dough depends on the temperature you ferment the dough.
To get proper flavor development from the cold fermentation process, I recommend leaving the dough balls for at least 24 hours. The cold fermented dough can be used sooner, but it will not be as flavorful.
In a cool room (60°F, or 15°C), you want to leave the dough for 24-48 hours, while in the fridge, leave it for 3-5 days (minimum 24 hours) for the best possible pizza crust.
Ingredients For Cold Fermented Pizza Dough
Using quality ingredients is essential when you’re making pizza. Especially if you take the time to cold ferment your dough, and want the best possible result. Making homemade pizza dough without proper ingredients is like building a house without proper materials. It doesn’t matter how good you are with the hammer if you’re using rotten wood and rusty nails. I therefore highly recommend spending some time and money getting quality ingredients before you start baking.
Flour for Cold Fermentation
The flours are the most important ingredients in pizza dough. In addition to being the biggest portion of the dough, it’s also where you will really notice the difference if you use the wrong type. You can use the best water, the fanciest salt, and the most expensive yeast, but if you don’t have the right type of flour the pizza crust will turn out bad.
The flour is also where most of the flavors that we’re developing by cold fermenting the dough come from, it’s there for the one ingredient that can make it or break it.
You Need a Strong Flour
You also want to use strong flour for cold fermentation. The strength of flour is measured in “W”, most commonly ranging from 100-300W. A stronger flour will give the dough a stronger gluten structure, that will keep its shape longer.
The strength of the flour describes the protein’s (or gluten’s) ability to develop and form stronger gluten walls. These walls trap the gas produced from the fermentation process and this is the reason dough increases in size when it’s rising. Strong gluten walls will hold onto the gas longer, which is essential for long fermentation.
A weak flour on the other hand will puncture and collapse if it’s left to ferment for too long. This is what’s called over-proofing. The reason this is happening is that the strength of the gluten structure can’t hold onto the gas for an extended period of time.
To get a better understanding of flour and gluten, and how it affects your dough, I recommend taking a look at this article.
I’ve tried a bunch of different types of flour for cold fermentation and found that the ideal strength is around 300W. A 300W flour will keep up well both in a cool room temperature (59°F, or 15°C) for 48 hours or up to a week in the fridge.
Unfortunately, most flours don’t have the strength printed on the package. Strength is however pretty closely related to gluten content, and you want to look for a flour that has a gluten content of 12-15%. Here is an overview of some common pizza flours and their strength:
| Flour | Strength | Protein content | Fermentation time |
| Caputo Classica | W 220-240 | 11.5% | Too weak for cold fermentation |
| Caputo pizzeria | W 260-270 | 12.5% | Short fermentation |
| Caputo Nuvola | W 260-280 | 12.5% | Medium Fermentation |
| King Arthur Bread Flour | 12.7% | Medium fermentation | |
| Caputo Chef’s Flour | W 300-320 | 13% | Long fermentation |
| Caputo Nuvola Super | W 320-340 | 13.5% | Long fermentation |
What Is the Best Flour for Cold Fermented Pizza Dough?
I recommend using a high-quality, strong Italian Tipo 00 or Tipo 0 flour for your cold fermented pizza dough. You can also use good bread flour and make amazing homemade pizza dough, but if you want the best result, Tipo is the way to go!
Tipo 00 flour is Italian-milled wheat flour, where the “00” refers to the finest milled flour on the Italian flour scale. Tipo 00 is also considered the highest quality flour on the scale. The reason is that it uses the core of the wheat and therefore has the least amount of brand and wheat middlings. Tipo 00 flour also has high stability, which is a measurement of the strength of the gluten in the dough. Stronger gluten will make the dough keep its shape longer, which is essential when you’re baking a long-rise dough.
Tipo 00 is the best choice for pizza because of the fine grind combined with high protein content. With proper kneading, you’ll end up with an elastic stretchy dough that is easy to work with. The high stability and strength of quality Tipo 00 flours are also important when you’re cold fermenting because you want the dough to keep its structure during the long leaving time.
Caputo Pizza Flour
I’ve tried several types of flour while developing this recipe, ranging from cheap no-brand pizza flours to expensive import flours. The challenge with a long rise is that the dough tends to puncture and collapse. You will then end up with a very flat, hard crust, not the light bubbly crust we’re looking for. The flour makes a huge difference.
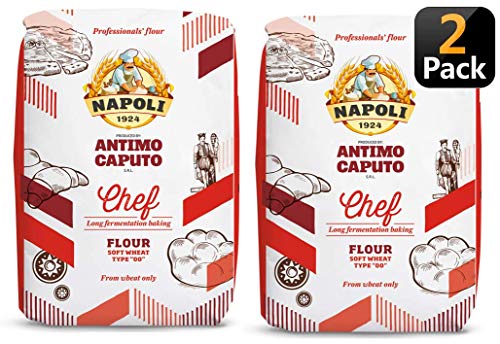
From my experiments, the best option for a long, cold fermented pizza dough is Caputo Chef’s Flour. This is a high-quality Tipo 00 with a strength of 300-320W, making it ideal for cold fermentation. The flour is milled in the Naples region in Italy, and despite not being the cheapest option, I think it’s worth the price. Caputo flours are also commonly used by pizzerias in Naples and are recognized by the True Neapolitan Pizza Association (AVPN). The strength of Caputo Chef’s Flour can handle the long fermentation times, and I haven’t experienced over-proofing, even leaving the dough for up to a week in the fridge.
If you want to know more about Caputo and their flours, check out our article: Caputo 00 Flour: Everything You Need to Know.
Clean Water
When baking pizza you should always use clean water. If you don’t have clean tap water, I recommend buying some quality bottled water. You should aim to use water that’s around 20°C (68°F) because the temperature will increase by a few degrees during kneading, and reach its ideal rising temperature for bulk fermentation.
Yeast
You can either use fresh or dried yeast. Fresh yeast tends to give you a little better flavor, but it doesn’t make that much of a difference. I think dry yeast is very convenient since it has a much longer shelf life than fresh yeast. My favorite yeast is Caputo Lievito. Caputo Lievito is made from a yeast species called Saccharomyces cerevisiae, which has been used for pizza baking in the Naples region for hundreds of years. It makes great pizza crust!

You can read my full review of how Caputo Lievito compares to fresh yeast here.
Adjust the Amount of Yeast Based on the Type You’re Using
This recipe is going to use active dry yeast, so if you decide to use another type of yeast, make sure to adjust the amount of yeast accordingly.
10g of fresh yeast is roughly equivalent to 5g of instant dry yeast, and 3g of dry active yeast.
When you cold ferment pizza dough over a long period, the amount of yeast needed is lower than what you find in most pizza recipes. The reason is that you want to slow down the rising process. If you want an even longer fermentation time you should lower the amount more than this recipe describes.
Salt
Good, fine sea salt is the best option!
If you want to know more about salt and how it affects the dough, click here.
Extra Virgin Olive Oil
In traditional Neapolitan pizza, you don’t add olive oil to the dough. Oil makes the dough conduct more heat, and in a blazing hot wood-fired oven, the dough will therefore burn. But you can use the conductive properties of oil to your advantage when you’re baking pizza in your home oven. The addition of oil will help achieve a crispier pizza crust in a regular home oven.
You don’t need a fancy 100-dollar bottle of olive oil for your pizza dough, but I still recommend investing in a decent bottle of extra virgin olive oil that doesn’t break the bank.
Extra virgin olive oil is unrefined, and the highest quality olive oil. It’s therefore also the best-tasting type of olive oil. When looking for olive oil, be aware that some companies add a small amount of extra virgin olive oil to a low-quality refined oil and advertise it as extra virgin. Stay away from those!
Toppings
When it comes to toppings, cold fermented pizza dough doesn’t dictate how you should top your pizza. You can of course use your favorite pizza sauce, cheese, and toppings, but if you’re looking for the perfect crust for crispy, Italian pizza, I have a few tips for you.
Don’t Overtop Your Pizza!
A very common mistake is to overtake the pizza. If you’re baking a Neapolitan-style pizza, you want a quick bake. If you add too many toppings, or too much sauce and cheese, it will take longer to bake the pizza. And you’ll end up with a soggy, underbaked pizza.
In addition to that, adding too many toppings will make it harder to move your pizza onto the
More is less when it comes to pizza toppings.
Here are some topping ideas for you!
The Simplest Pizza Sauce Is the Best
It’s not very often I recommend putting anything you find in a tin can in most grocery stores on your pizza, but that is the best option for pizza sauce. Fresh tomatoes are only in season for a short period, so most of the year the tomatoes you’ll find in your local grocery store are not sweet and flavorful.
Pizza Sauce Recipe
San Marzano tomatoes are what’s used in Naples. They are picked when they are in season, and the canning process makes them keep the flavor. I think making San Marzano tomatoes makes a difference, but I know they can be expensive and hard to find. Therefore a good substitute is canned cherry tomatoes, that’s a bit similar in flavor.
In addition to tomatoes, you’ll need salt, basil, and extra virgin olive oil.
- One 400g (14oz) can of whole, skinless tomatoes (preferably San Marzano tomatoes)
- 4g (a little less than 1 teaspoon) of sea salt
- 3-4 leaves of fresh basil
- 15g (1 tablespoon) of extra virgin olive oil
Then simply mix the ingredients before adding them to your pizza. You can also add a little bit of sugar if your tomatoes aren’t sweet enough. For the full recipe, click here: Neapolitan pizza sauce recipe.
Cheese
You can use any kind of cheese you like, as long as you don’t put too much. The most traditional option and my favorite is fresh mozzarella, which gives a nice, creamy texture and great flavor, to the pizza. In combination with the tomato sauce, fresh mozzarella is really delicious.
If you want to add some stronger, more interesting flavors, adding some hard, aged cheese is great. Pecorino Romano or Parmigiano-Reggiano are great options.
Baking Cold Fermented Pizza
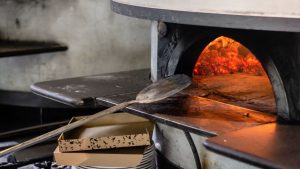
There are several ways you can bake your pizza, but the key is a quick bake at a high temperature.
The Ideal Way to Bake Pizza – What We’re Trying to Achieve
A traditional Neapolitan pizza is baked in a wood-fired oven at around 900°F (480°C) for 60-90 seconds. The pizza is baked with a combination of radiating heat from the ceiling the direct contact with the floor of the wood fired

When you want to re-create the same baking environment at home, these are the two things, you’re looking for: hot radiating heat from above and a hot baking surface. There also needs to be a balance between the two heat sources, or else we might end up with raw dough and burnt pizza toppings, or burnt bottom and raw toppings.
This quick bake results in a crispy, blistered (leopard) pizza crust, that’s still airy and soft on the inside. This is something we only can achieve with a very fast bake. And that’s why your homemade grandma pies, often end up denser, and not as crispy and nice. It’s simply not possible to get this kind of bake on a baking tray at home. But after doing a lot of experiments with different baking methods, I’ve found a way to achieve a similar bake in a home oven!
Baking Cold Fermented Pizza at Home
If you have a proper
What You’ll Need for the Perfect Bake
- A
pizza peel - A pizza stone or
pizza steel
A Pizza Peel to Transfer the Pizza
Whether you’re baking pizza in a

In addition to a
Baking Pizza in a Home Oven – Pizza Stone or Pizza Steel
The easiest and cheapest option is to bake the pizza in a regular home oven. But is it possible to get a proper bake in a home oven? Yes, with the right tools and techniques, it’s possible! The pizza at the start of this article was baked on a
As mentioned above, there are two things we need to work on to re-create
How to Get a Hot Enough Baking Surface
Let’s talk about the baking surface first. What you need is a baking surface that can retain and conduct heat well. If you’re simply placing a thin aluminum baking sheet in the oven with the pizza on, it’s not going to get hot enough.
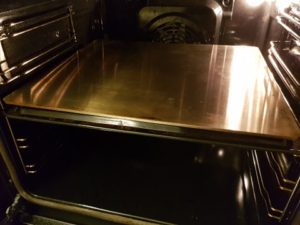
The best option is either a pizza stone or a
The thickness of the stone or steel will affect how much heat it can retain. This means that a thicker stone or steel will bake the pizza faster than a thin stone or steel.
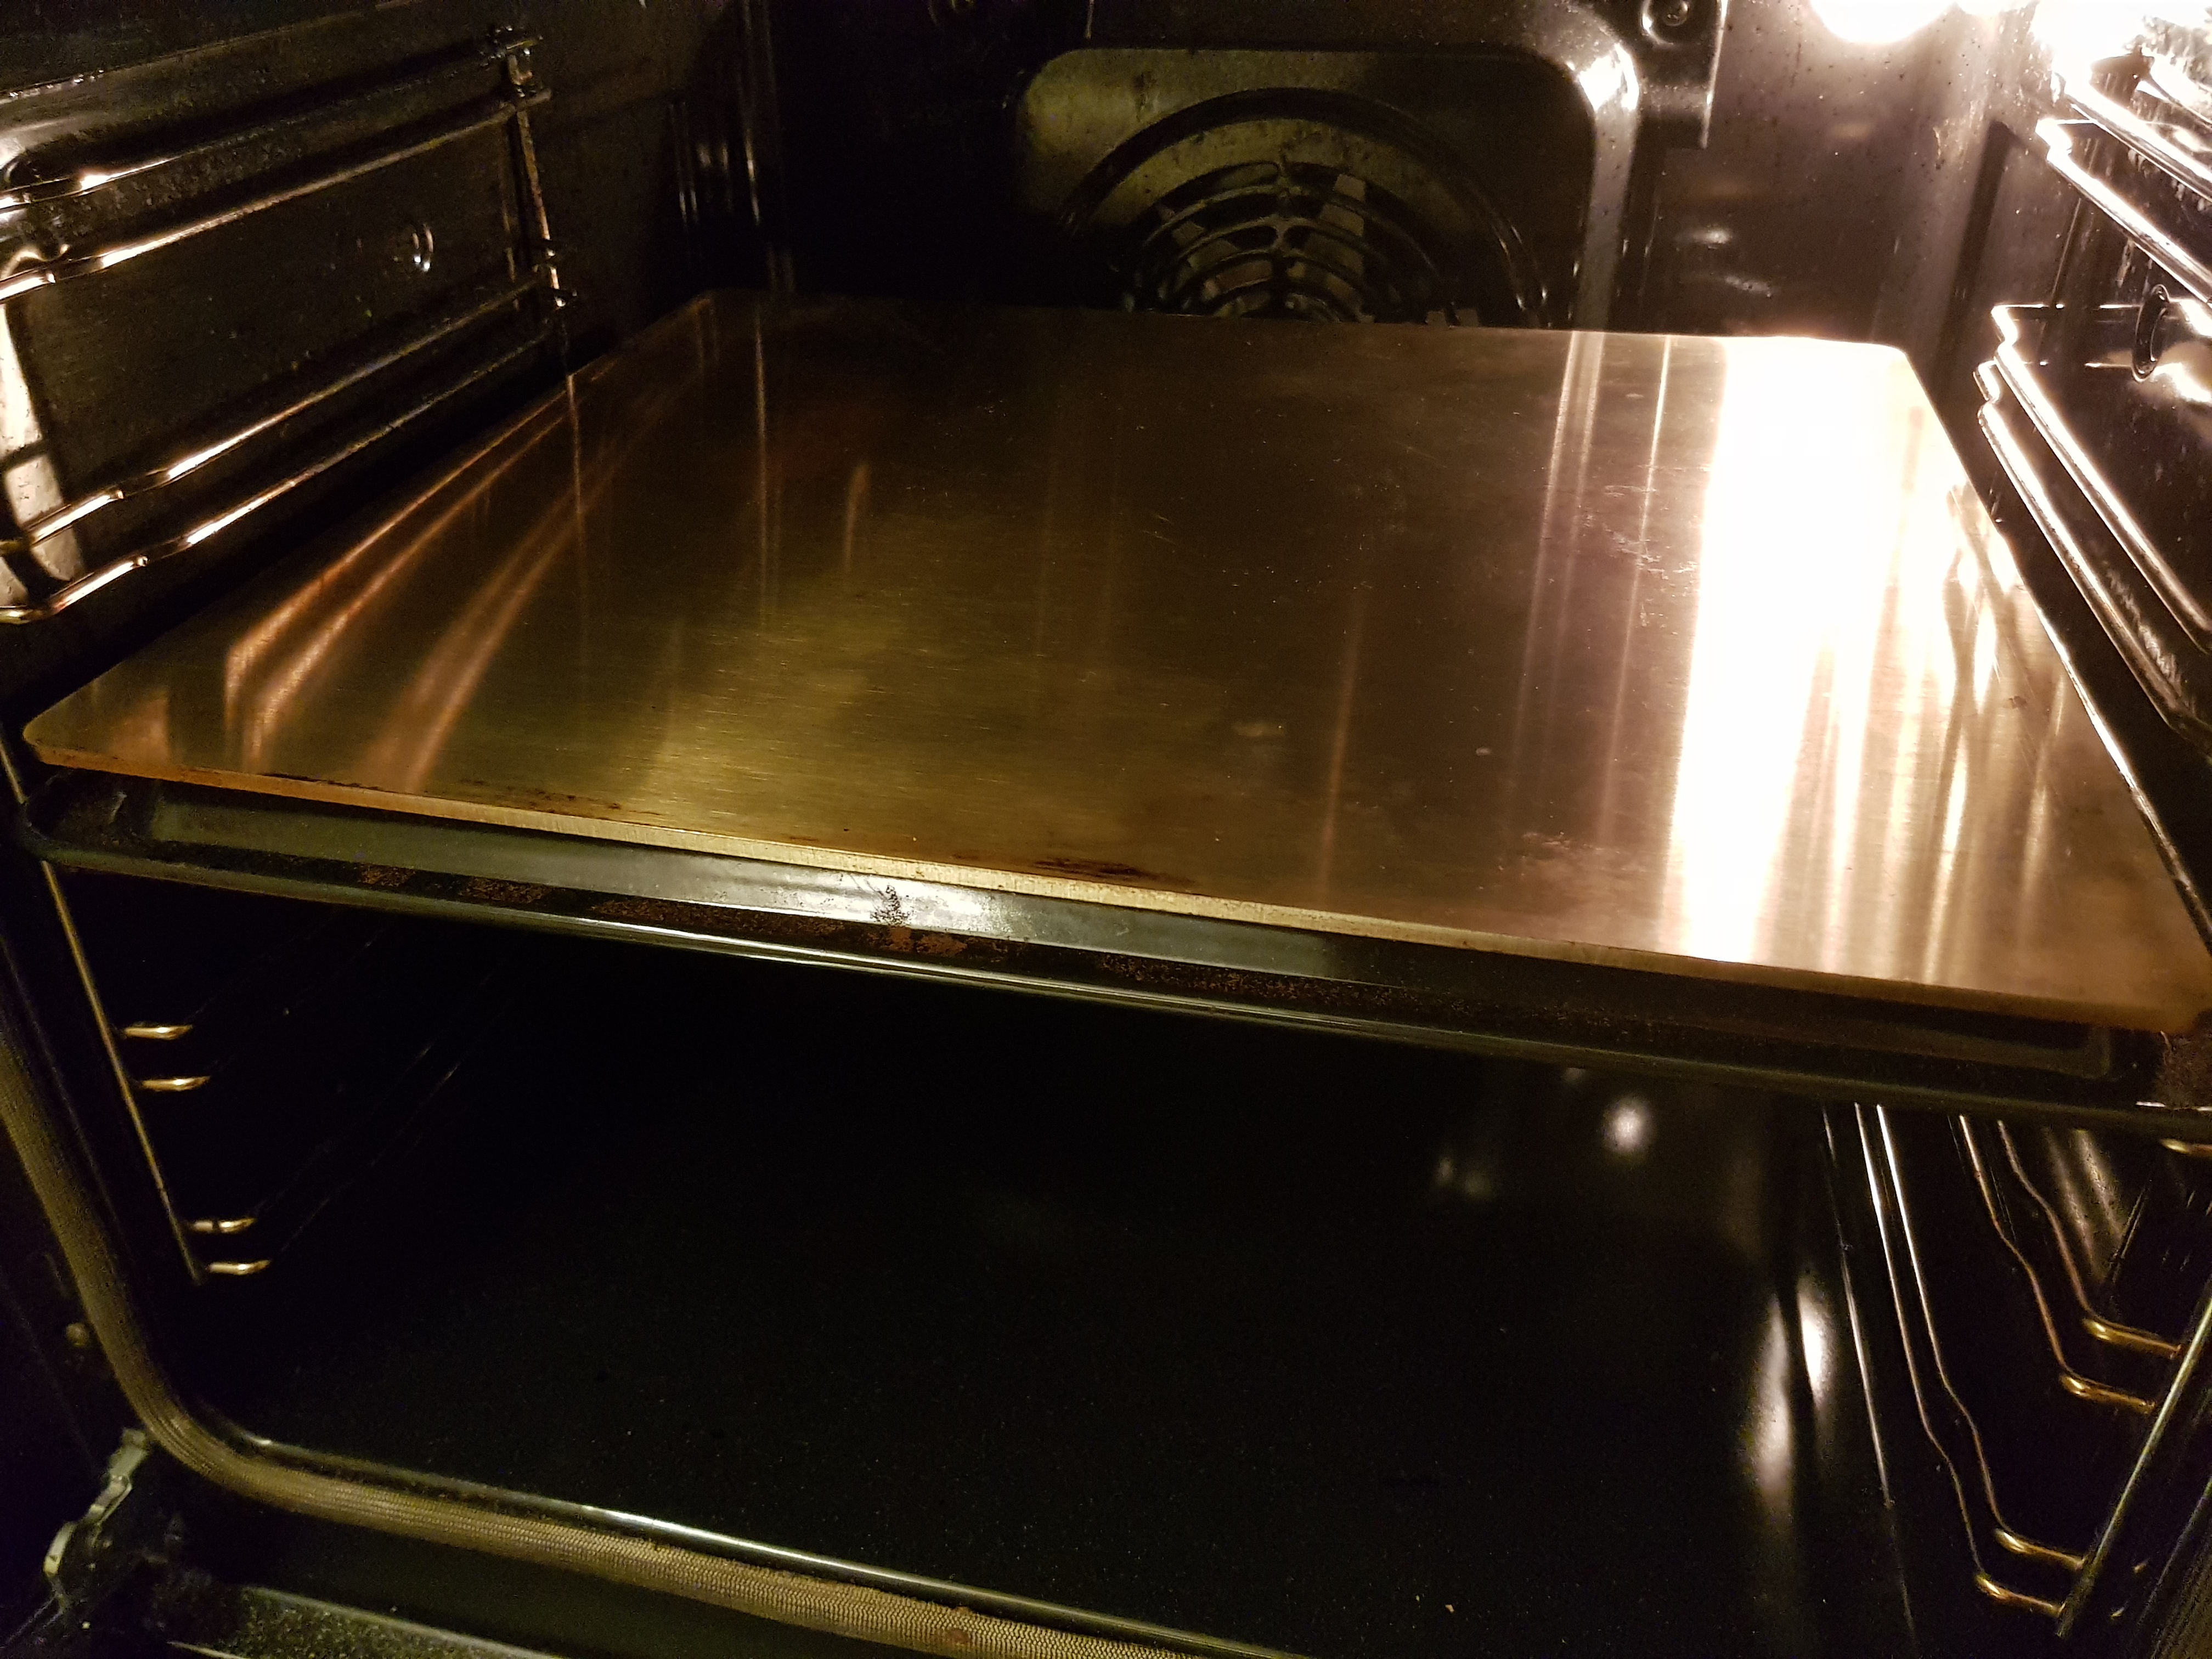
To bake pizza on a pizza stone or steel, you first have to preheat it. Place it in the oven, and let it preheat with the oven for at least 45-60 minutes. The baking surface needs time to heat up to be able to retain enough heat. This will give you that nice blistered pattern, you’ll see from wood-fired ovens.
One thing to keep in mind is that baking several consecutive pizzas will lower the temperature of the baking surface. The reason is that the cold (room temperature) pizza dough will cool it down, and block any re-heating while the pizza is baking. I, therefore, recommend re-heating the stone for 10-15 minutes after every 2 pizzas to make sure they all come out nice and crispy.
If you want to learn more about baking pizza on a
Baking the Top of the Pizza
The next challenge is the radiating heat. Luckily, most ovens come with a broil or grill element, which gets really hot. This is perfect for increasing the temperature of pizza baking!
Since the heat is stronger the closer you get to the broiler, you want to place your pizza stone or steel as close as possible to the broiler. Ideally around 2 inches (5 cm). I, therefore, recommend placing the pizza stone or steel on the top rack in your oven. If that’s not close enough, you can place it on an upside-down deep baking sheet to get it closer to the broiler.
Another tip is to use the broiler when you heat the baking surface, as this is going to make it even hotter.
When you’re baking the pizza is that the broiler tends to go on and off, trying to keep the temperature you’ve set your oven on. But to make that nice charred, leopard crust on the pizza you want the broiler to be on as much as possible during baking. A way to do that is to turn down the oven temperature a bit a few minutes before baking, and then crank it back up to the highest setting again when you add your pizza. This will make sure the broiler is on most of the baking time. The baking surface should be able to hold the heat well enough so this trick shouldn’t affect that negatively. If you want to know more about charing and creating a beautiful leopard pattern on your pizza crusts, check out this easy guide.
Baking Time in a Home Oven
The baking time depends on the temperature of your oven, the broiler, and the thickness and material of your baking surface. It’s therefore impossible to give you the one perfect baking time. The short answer is as short as possible, but it really depends on what temperature your oven can reach. With a hot pizza stone or steel and a broiler, you should be able to bake a pizza in 3-8 minutes. The most important thing is to get to know your oven and keep a close eye on the pizza.
One thing to keep in mind is that there needs to be a balance between the temperature of the oven (or broiler) and the baking surface. As mentioned above, a thicker stone or steel will bake the pizza quicker. But if your oven can’t hold up to the baking speed of the baking surface, you might end up with a burnt bottom and an undercooked top. Therefore, I recommend getting a thinner stone or steel if your oven can only reach 500°F (250°C) than if it can reach 600°F (300°C).
The bottom line is that you need to get to know your oven and your equipment. And to keep a close eye on the pizza. In a hot oven, the pizza can burn very quickly.
If you want to know more about baking times and temperatures, I recommend checking out this article.
The Best Pizza Steel for Cold Fermented Pizza
I prefer pizza steels over pizza stones because they conduct heat better. They are also more durable and easier to clean and maintain. For baking cold fermented pizza, I recommend the Conductive Cooking Square
The reason I recommend the Conductive Cooking Square Deluxe is that it’s incredibly durable and solid
The extra-large baking surface and the thickness make the Conductive Cooking Square the perfect all-around

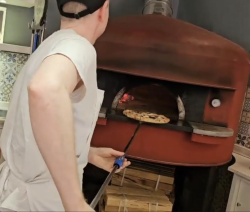
Baking in a Pizza Oven
Things are a bit easier in a
You don’t need a huge, expensive wood-fired oven to make good pizza dough!
With an
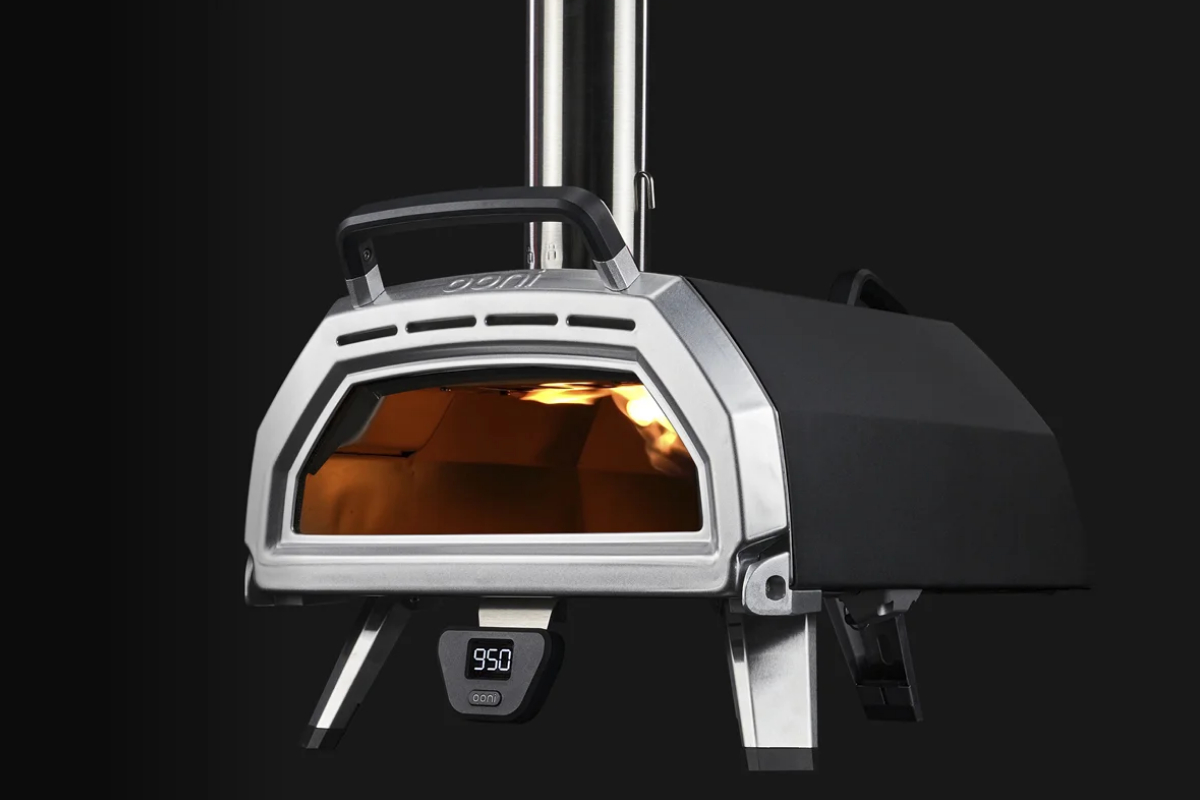
Tip: for more consistency when baking in a
Cold Fermented Pizza Dough Recipe – Let’s Put it All Together
his recipe yields 4 portion-sized pizzas of around 30cm or 12 inches. You can of course double the recipe if you love pizza! And if you have any leftover pizza dough, you can always freeze it. Check out our article on how you store pizza dough if you want to know more.
Let’s get started!
Ingredients
- 500g Tipo 00 flour (100%)
- 320ml water (64%)
- 10g salt (2%)
- 1g instant dry yeast (0.2%)
- 10g extra virgin olive oil (2%)
- A pinch of semolina for dusting the
pizza peel - Tomato sauce, cheese, and other toppings of your choice
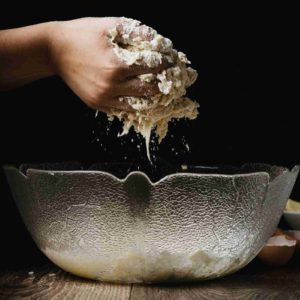
1. Making The Cold Fermented Pizza Dough
Pour room temperature water (ideally around 20°C/68°F) into a large mixing bowl. Then add the salt and mix until the salt is completely dissolved.
Next, add around 10% of your flour and mix it well, until it’s completely incorporated, and has a batter-like consistency. Add the yeast, and dissolve it in the flour-water mix. Then continue adding the flour, a little at a time, until the dough has formed. When all the flour is mixed in, let the dough rest for 20-30 minutes before adding the oil.
The reason you want to leave the dough before kneading is to let the gluten hydrate and start developing, This step is called autolyse, and will help develop a more stretchy pizza dough.
Then knead the dough either in a stand mixer for around 5 minutes at low speed with a dough hook, or for around 5-10 minutes by hand, until the oil is fully incorporated, and you’re left with a smooth, nice dough. You can use the Windowpane test to check when the dough is ready.
I prefer kneading by hand because it gives me more control over the dough!
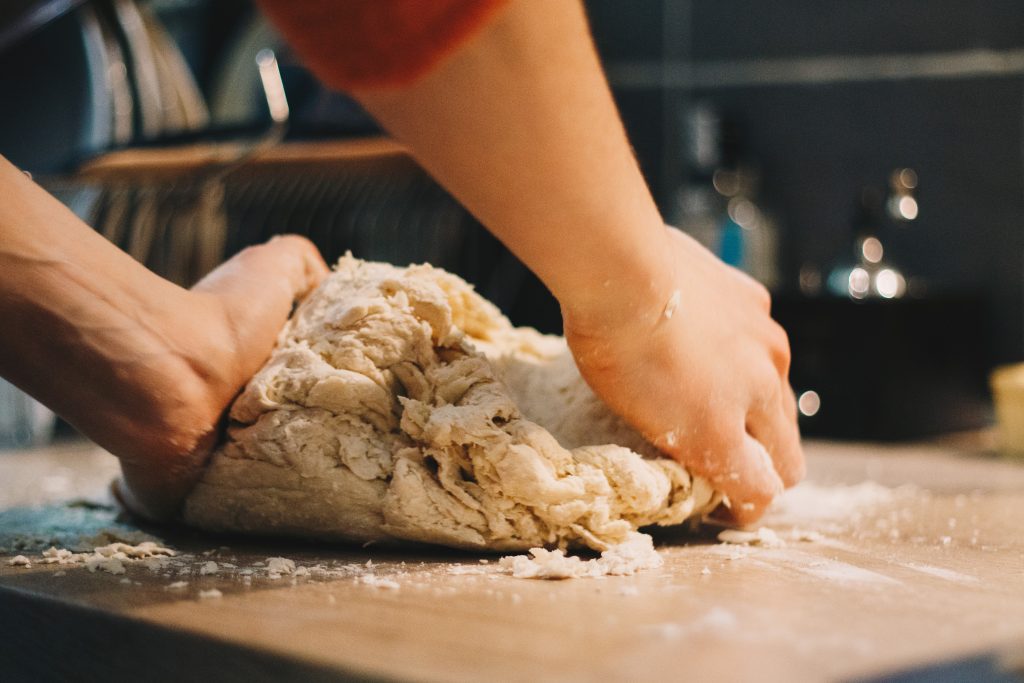
Many factors can affect the dough’s consistency, like the amount of gluten in the flour. Other factors are the temperature and humidity in the room you’re baking. You may therefore have to adjust the amount of flour in the dough slightly. Either increase it if you’re in a humid environment or reduce it if you’re in a very dry environment. When you’ve made pizza a few times, you can feel if the dough has the right consistency or not. And how you have to adjust it to achieve the desired results. But don’t worry too much about that if this is your first time making pizza. Simply follow the amounts described in the recipe. You can always make some adjustments next time!
2. Rising the Dough – Bulk Fermentation
Before we can cold ferment the dough, we need to leave it to rise in a large bowl covered with a damp towel or plastic wrap for 2 hours. This is called bulk fermentation because you let the whole dough rise. Bulk fermentation gets the yeast going, and gives the dough a good start for the cold fermentation.
If you’re worried the dough will stick to the bowl, you can lightly brush it with some olive oil. The dough does however already contain oil so the dough should be easy to get out. If you want to know more about preventing sticking, check out the article Why Is My Pizza Dough Sticky? And How to Fix It.
3. Make Dough Balls
Next, split the dough into 4 equal size pizza balls using a pizza dough scraper or a knife. And form four nice, even pizza balls. I recommend weighting them as well, to check that they are roughly the same weight.
Then place the dough balls in an air-tight container. Ideally a pizza rising box, but you can use any Tupperware container with a lid or individual bowls with plastic wrap. The most important thing is that it’s air-tight, to prevent a hard surface from forming on the dough balls. This is extra important when you’re leaving the dough for several days.

4. Cold Ferment the Dough
Now it’s time to cold ferment the dough. Place the dough balls in the fridge for 3-5 days. Or in a cool room (60°F, or 15°C), for 24-48 hours. Don’t touch the dough, just leave it there to do its thing.
5. Prepare to Bake the Pizza
A couple of hours before you’re going to bake your cold fermented pizza, you need to take out the dough and place it at room temperature. This will both make the dough more pliable, and it will bake better.
Another thing you need to do is preheat your oven for at least 45-60 minutes. Place your pizza stone or steel on the top rack, as close as possible to the broiler. Then turn the oven up to the highest setting, and turn on the broiler.
Getting your sauce, cheese, and toppings ready before starting to work on the dough, will also make the assembly easier.
6. Make the Pizza
When the oven is hot enough, and the dough has come to room temperature, it’s time to make our cold fermented pizza.
Start by taking out one dough ball using a dough scraper, and placing it in a small bowl filled with flour. This will cover the dough with a layer of flour that will help prevent sticking. Lift the ball with your hands and shake off any excess flour. You want the flour to cover the dough ball, but you don’t want more flour than necessary. The reason is that the excess flour can burn in the oven.
Then stretch the dough out by hand to around 12 inches (30cm) in diameter. You want to leave an inch (a couple of centimeters) on the edge of the pizza to form the crust (cornicione). This is going to create a nice, tall crust with air bubbles when you bake the pizza. The middle of the pizza, on the other hand, should be thin, almost so thin that you can see through the dough.
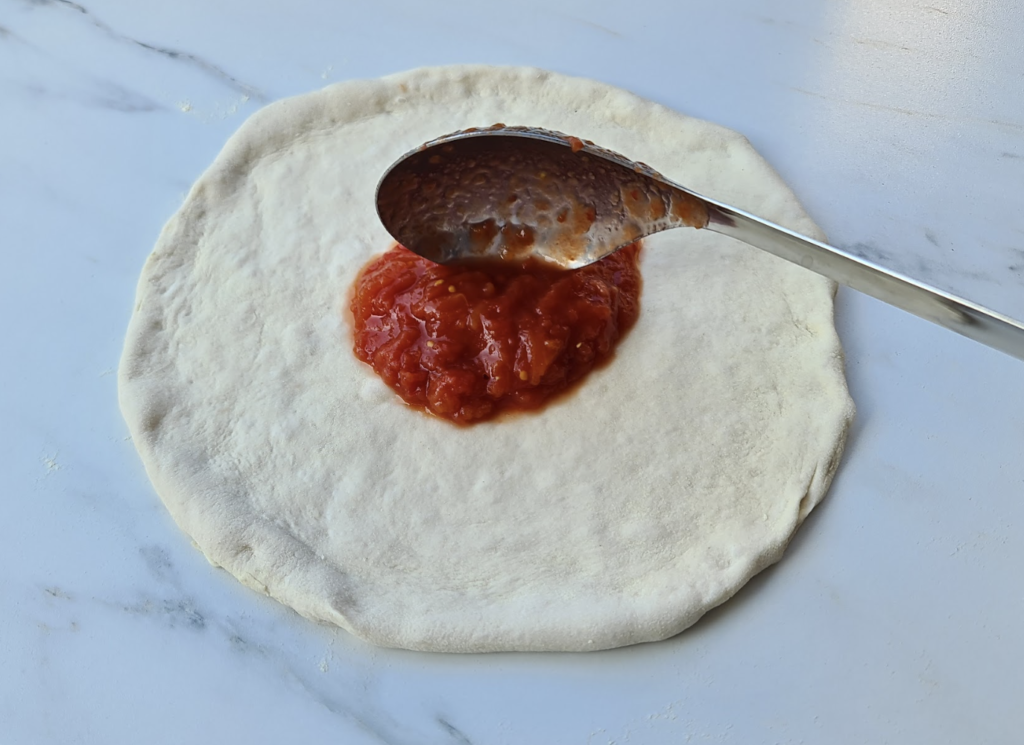
Next add sauce, cheese, and any other topping to the pizza.
Then lightly drizzle a pinch of semolina to prevent the dough from sticking to the peel. Then carefully drag it over to a
Then, simply transfer the pizza into the hot oven.
7. Bake the Pizza
When you’re baking a pizza in a hot oven with a broiler, you need to keep an eye on the pizza. It can quickly go from done to burnt! Depending on how hot your oven and broiler are, bake the pizza for 3-8 minutes. You know it’s done when the crust is nice and crispy, slightly charred, and the cheese is melted. Use your
8. Enjoy Amazing Cold Fermented Pizza
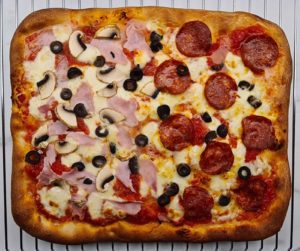
This is a portion-sized pizza, so you can place it straight on a serving plate. Or you can do what I usually do, place it on a wooden chopping board and cut it into slices, so everyone around the table can enjoy a slice of every delicious pizza!

Cold Fermented Pizza Dough
Ingredients
- 500 g Tipo 00 flour (W300)
- 320 ml water
- 10 g salt
- 1 g instand dry yeast
- 10 g extra virgin olive oil
Instructions
- Pour room temperature water (ideally around 20°C/68°F) into a large mixing bowl. Then add the salt and mix until the salt is completely dissolved.Next, add around 10% of your flour and mix it well, until its completely incorporated, and have a batter-like consistency. Add the yeast, dissolve it in the flour-water mix. Then continue adding the flour, a little at a time, until the dough has formed.Let the dough rest for 20-30 mintues for the gluten to absorb the water, thena add the oil.Then knead the dough either in a stand stand mixer 5 minutes with a dough hook, or for around 5-10 inutes by hand.
- Leave the dough to rise in a bowl covered with a damp towel or plastic wrap for 2 hours.
- Next, split the dough into 4 equal size pizza balls using a pizza dough scraper or a knife. And form four nice, even pizza balls. And place them in an air-tight container.
- Place the dough balls in the fridge for 3-5 days. Or in a cool room (59°F, or 15°C), for 24-48 hours.
- A couple of hours before you're going to bake your cold fermented pizza, take out the dough, and place it in room temperature. Meanwhile, place your pizza stone or steel in the oven, and preheating it for at least 45-60 minutes with the broiler on.
- Dust the pizza dough with flour and stretch it out to a 12 inches (30cm) in diameter circle. Next add sauce, cheese and toppings. And move it to your lightly dusted pizza peel.
- Bake the pizza for 3-8 minutes depending on your oven. It's done when the crust is nice and crispy, slightly charred, and the cheese is melted. Use your pizza peel to get the pizza out of the oven
Related


- Neapolitan Pizza Dough Planner - June 7, 2026
- Is Your Pizza Dough Too Dry? Here is How to fix it! - June 10, 2024
- The Ultimate Guide to the Pizza Dough Windowpane Test - June 8, 2024
Great Recipe with good explanations!
Can I try this recipe with bread flour and would making 3 balls out of it make to big of a pizza? I’ve been using a recipe from someone that uses a food processor with a plastic blade to kneed the dough for 30 seconds. The pie comes out great on my bbq with a stone but I do have a problem with the dough getting a hole in it when I stretch it
Yes, bread flour should work, but unless you know how strong the flour is, I would try a short ferment first and rather increase the fermentation over time so you don’t overproof your dough. I don’t have any experience using a food processor for pizza dough so I can’t comment if that’s related. But if you’re having problems with tearing, it’s most likely related to a lack of gluten. It could be your flour is too weak (that should not be a problem if you’re using bread flour), over proving (you left the dough to rise for too long), or lack of kneading.
In your strength table, you list short, medium, and long fermentation. How long is ‘short?’ I just purchased Caputo pizzeria flour and want to know since you list that as a ‘short’ fermentation if it’ll still last the 3-5 day range you recommend.
Thanks for the detailed recipe!
This is pretty similar to the method I’ve followed the last few years, and it always turn good.
Hi thanks for the details, just have one question, when you form the dough balls and put in the fridge, what is the minimum time needed to rest before it’s ready to use?
Hi, Jane! You should leave the dough balls in the fridge for at least 24 hours. You can use them sooner (if you’re in a hurry, I’ve sometimes used the dough after 2-3 hours), but then you’ll have less flavor development from the cold fermentation process.
Great question! I will add the answer in the article too.
– Andreas
Hi Andreas, I just wondered why some pizza professionals mix their flours when making pizza dough. What are the benefits of this?
Many thanks
Anna
Hi, I’m not sure I completely understand what you’re asking. Do you mean mixing two or more different types of flour in the dough? Using two or more fours is usually done to give the dough different properties. For example to increase the strength, make it healthier, or change the flavor. So it’s a way to have more control over the dough and take it to the next level. But unless you’re looking for something very specific you can make amazing dough with a single flour. And if you’re a beginner, I definitely recommend sticking to the same flour for making consistent dough. And rather change other variables if you want to change the dough and crust of your pizza.
The only problem I have is trying to make an edge on my pizza
Going to try this my problem is trying to get the edge to look like the picture
You need a broiler to get that kind of charring, and place the pizza really close to the broiler. Good luck! 🙂
When do you add the oil to the dough. I don’t see it in the recipe.
Add the olive oil right after dissolving the yeast. I’ve also updated the recipe now.
Jeez. I just kneaded in the evoo because I didn’t see the update. Is it wrecked? It’s in the two hour rise.
It doesn’t make that much of a difference, to be honest. So mixing it in during the initial kneading is totally fine!
Hello, I’m currently in a colder area so right now the temperature are below 16°C, so I’ll let my dough cold ferment outside. You asked to let the dough come to room temperature after the fermentation is completed. But since it’s cold should I keep it in a warmer room to warm up?
Hello, Isha, if you have a warmer room I recommend leaving the dough there prior to stretching the pizza, as this will make it a bit easier to stretch and shape the dough. But you can make perfectly good pizza if you’re working with the dough at 16°C too. The gluten will just be a little tighter and, something that will make it a bit harder to stretch the pizza properly. I’ve used pizza dough straight from the fridge several times (around 3°C), and the result was still great! 🙂
I’m determined to become a master home pizza chef! With that said I spend hours researching methods of dough making….one thing I see often is salt and oil should be the last ingredients as they retard development of the the yeast and hamper proper hydration of the flour. In your recipe the first thing you do is add salt to the water!
Please comment!
Thanks!
Hi, this recipe is inspired by Neapolitan-style pizza, where the salt is traditionally added to the water first.
Salt, in high concentration, will kill the yeast. The concentration is however not that high in this recipe. Time is also a factor, the longer the yeast is in contact with the (higher concentration of) salt, the more likely it is to be affected. The reason salt is adding to the mixing process is that it strengthens the gluten bonding, resulting in stronger gluten development. This is beneficial for slow-fermented pizza dough since the dough will hold up better during the fermentation process.
You’re right about the oil. It does prevent the flour from absorbing as much water when added early. It would be better to add the oil after you’ve formed the dough and let it rest a few minutes for the flour to fully absorb the water. I’ve updated the recipe. Adding the oil early was something did back a few years ago, before I knew that much about baking chemistry. Nowadays, I often don’t add the oil at all (essentially making Neapolitan pizza dough).
Hi Joe
Do you have your own pizza dough recipe?
I’d love to know your recipe.
Thanks
Marcia
Wow ! As a self taught home pizza cook (always refining recipe/process over 15 years) I am happy to know I have been doing things mostly correctly and ~90% of your recipe/process but more importantly I learned a few things from you and will try asap.
The “problem” with creating the best tasting pizzas at home is you and family will never want to go out for pizza again (esp. in suburban USA), because most take out/fast food/restaurant pizza isn’t anywhere near as good ! So home cooked pizza once a week has been our routine for 10 years. And we even invested in a wood fired oven for nice weather. Great post !!
Thank you! I’m happy to hear that you found my post useful. And I totally agree, going out for pizza isn’t quite the same after learning how to make proper pizza!
A few things to add to the conversation – Yes for Steel pizza stone, it does perform better at browning/charring the bottom. It lives in my oven on top rack and even helps balance out the heat when cooking other things. Also a big fan of cold fermenting. Up to 4 days in fridge before the dough starts to break down but days 2-3 have amazing flavor almost like poolish or light sourdough. I don’t add EVOO to mix for same reasons mentioned above, instead I, coat my boules with EVOO before proofing in air tight containers so they don’t get crusty and the dough will pick up the benefits from there. And lastly, been experimenting with freezing my boules for later use with great results. Just dust with flour and seal in freezer bag for up to couple months. Let defrost and proof at RT for 8-10 or so before cooking. This way we can have spontaneous pizza nights !
I am an 80 years old man very much interested in making the best Neapolitan pizza using my wood fired or home oven. I have gone through your pizza papers from a to z. I think they are the best. Thanks for your effort.
I’m happy to hear that!
Hi Andreas,
Would you mind checking my conversions below for accuracy.
500 g tipo 00 flour: 4 cups
320 ml water: 1 1/3 cups
10 g salt: 1 3/4 teaspoons
1 g dry active yeast: 1/3 teaspoon
10 g extra virgin olive oil 3/4 tablespoon
Hi! I strongly recommend measuring ingredients by weight rather than volume. Volume is pretty inaccurate in comparison. You’ll easily end up 5-10% off if you measure flour by volume, and may end up with a completely different pizza dough than you expected since this will affect the hydration. But if you still want to go by volume, it seems pretty accurate to me.
If you split a bag of 00 flour into equal portions into two 1 quart measuring cups, and shake the cups so the flour settles, they will end at about 3 1/3 cups. I agree that weighing is more accurate. I do like this recipe.
I would love to try the pizza recipe but could you give us the measurements and you ask? I can’t quite figure it out and I don’t want to make the mistake. it sounds like a keeper and that you can make it in the beginning of the week and have it toward the end of the week or whatever so that would be great thanks a lot
I’m not quite sure I understand what you’re asking. If you by measurements mean the amount of each ingredient, they are in the recipe (here).
In my house, Saturday is usually pizza night. So to prepare pizza dough for Saturday night, I usually make the dough Wednesday evening, if I make cold fermented pizza.
It’s only me and I don’t mint left over or cold pizza but 4 pizzas is too many .
If I wamted to freeze some what pricess do you recommend.
Have a look at this article: https://thepizzaheaven.com/how-to-freeze-pizza-dough/
Hello, after forming the dough balls they are very sticky. Did I not add enough flower?
Hi. This is great information, thank you! Is there a difference between bulk fermenting the dough for 24-48 hours at 15 degrees Celsius and then making the balls and stretching the dough rather than making the balls and letting them ferment in the fridge as balls as per your method?
Hi, I haven’t experimented a whole lot with bulk fermentation vs. dough ball fermentation at low temperatures. When it comes to temperature differences (fridge temp or 15 degrees Celsius), fridge temperature will pretty much completely stop the dough from rising, something that allows the dough to be stored longer without overproofing. From my experience, this results in more flavor. I also find it convenient that I have a larger window to use the dough, if it’s left a day shorter or a day longer, it doesn’t affect the dough that much (given that you use a flour that’s strong enough). There are also other ways to achieve flavor, like using a sourdough starter, poolish vs biga.
If you’re comparing bulk fermentation vs. dough balls fermentation at the same temperature, from my understanding, you’ll get more rise from a long bulk fermentation process because the dough takes longer to cool, (from room temperature to e.g. 15 degrees Celsius), and dough fermented in bulk will produce more heat.
Hi Andreas – the recipe shows 10g of salt in one place and 7.5g of salt in a different place. Please let me know which is correct. Thx!
Hi! It should be 10g (2%). I have updated the recipe now.
Hi, I’ve just started on my cold fermented pizza dough journey. I’ve followed the instructions and now have the 4 dough balls sealed in a Tupperware container in my underground storeroom rather than the fridge (since it’s winter here). I’m in Sydney, Australia and the max day time temp is around 18°C and drops to around 8°C overnight. Would 30 hours be an ok fermentation time in the storeroom temp? I’m wanting to cook pizza tomorrow night! Thank you 🙂
What’s the temperature in the storeroom? You can use the app PizzApp+ (both for iPhone and Android). Just plug in the temp and how many hours (30 hours for you) and it will tell how much yeast you’ll need for a perfect dough in 30 hours! 🙂
Thank you! I think my dough was overproofed as the pizza was a bit dense. Although a beautiful crisp base and the flavour was amazing. I’ve got another batch of dough kneading in the machine now and I’m going to put these in the fridge for 3 days. Thanks again
🤯
Thank you for all the great pizza R&d!
A small tabletop wine cooler type refrigerator can be set for 15 degrees Centigrade and used for cold germination. They are rather inexpensive too.
Thanks for publishing this. I have followed the recipe and have made my best pizza dough ever. I will be playing with the recipe to understand it better going forward.
I am working on a show, which to be honest I am not sure will ever open. Nonetheless, I would like to add you to my list of people I owe free tickets. Thanks again, and have shared this link with a few people too.
I’m happy to hear that! 🍕
Proof reading the article would have been nice. I am a Pro baker with 50 years in the industry. Almost any vegetable oil is suitable for Pizza dough and though it is nice to use expensive name brand flours, you can make a perfect delicious crust with almost any quality high gluten bread flour, especially King Arthur’s or Bob’s Red Mill. The article was very good.
Thank you for your insight and feedback! We will definitely improve the writing on the website.
thats a garbage answer, family run pizza shop for 50 years, true authentic Neapolitan pizza is exact- meaning proper W rating, fresh yeast, not any GARBAGE King Arthur flour….F outta here….
No MAN EVER says any “vegetable oil”……Medagone
Thanks for your very informative article. I have a question about the bulk fermentation. I have a proofing setting on my oven. Is it better to proof in the oven for 2 hours or just proof at room temperature? Thanks.
Both should be fine, just make sure the proofing temperature isn’t too high. The benefit of using the oven setting is that the temperature might be more stable than on the countertop. Actually, I sometimes leave my dough to ferment in the oven, turned off (I don’t have a proofing setting on my oven), to get a more stable temperature.
My dough looked great in the stand mixer, but after i separate into balls and put in fridge it has a runny look, like it’s just formed to the shape of the bottom of the bowls, and not a ball at all. Do you know what went wrong? I do not own a kitchen scale (yet) and went with conversions. Maybe the flour isn’t enough? Thanks for any light you could shed!!
It sounds like your dough had too high hydration (too much water compared to flour), too little gluten development, or that you used too weak flour. I strongly recommend getting a kitchen scale if you’re interested in pizza baking. It’s very hard to get a consistent result by measuring ingredients by volume compared to weight.
I’m curious. Should the olive oil be added to the dough recipe if the pizza will be cooked in an oven like an Ooni Koda 16. You mentioned that this is not traditionally the case for Neapolitan pizza.
If you’re using a pizza oven, like the Ooni Koda 16, I would skip the oil. Oil will help transfer heat and bake the pizza faster, which is beneficial in a convection oven since it doesn’t get that hot. But in gas or wood-fired ovens, the addition of oil will make the pizza burn more easily, that’s why it’s not traditionally added to Neapolitan pizza dough 🙂
If anyone is interested in a slightly healthier alternative I recommend Caputo Tipo 1 Flour. It has more of the bran left in and is more easily digestible than the 00 flour.
No adjustment to the recipe is necessary, other than replacing the type of flour. I also add a tablespoon of honey to the mixture. It gives a subtle flavor boost to the crust, not to mention it’s benefit to the fermentation process.
Turned out great! Thank you for the recipe.
This recipe is the real deal… Last night I made the best looking and tasting pizza I’ve ever had. Thank you very much for releasing this to the internet for all to benefit from.
I’m happy to hear that! 🙂
Thank you for sharing this recipe! I just made the best pizza I ever tried!
I have baked a lot of pizza, and always focused on the toppings. I never event though about the dough, but cold-fermenting the dough really makes a huge difference!
I don’t know where I came across cold fermented pizza the first time, but I’ve been looking around the Internet, and this is the most detailed guide I have found on the topic.
If anyone has not tried, please give it a try! Just follow the instructions accurately! The result was truly amazing, I can never go back to any other pizza recipe again.
I love the detail you put in this post. Thank you. If I use bread flour instead of 00 flour, are the ingredient quantities and process exact same? Note that I will be baking in a home oven at 550 degrees.
Yes, the ingredient quantities and process should be the same. Bread flour should work great both for longer fermentation and for baking in a 550°F oven. The most important thing to look for when picking flour is the strength of the flour. Usually the higher the protein content, the stronger the flour is. And the stronger the flour is, the longer you can ferment the dough. But I would not ferment the dough for more than 24-48 hours if it’s the first time you try cold-fermenting with it.
I’m just getting ready to try the pizza dough recipe which looks amazing but I’m confused by the quantity of yeast that you mention in the preamble versus what is listed in the recipe. In the recipe, you say 1gm but in the preamble on yeast, you suggest 3gms of active dry yeast.
Thanks
It should be 1g of active dry yeast (I will emphasize that in the ingredient list). The amounts mentioned yeast section is a more general example of how you can account for different types of yeast.
Do you have any advice on kneading technique? Sometimes I feel like my dough is overworked because it gets dense and difficult to stretch. I can’t quite seem to get the silky texture that this tough sboudt have.
After kneading, I would give the dough a few minutes to rest, before doing the final shaping. When you knead the dough, the gluten will tighten, and make the feel dense and harder to stretch. But if you leave the dough to rest for 5-10 minutes, the gluten will relax, and the dough will be much more stretchy and get a smoother surface.
Hi
With Sto little yeast. Wil the dough rise after the initial mixing?
Hi. Yes, it should rise. This dough formulation is inspired by Neapolitan-style dough, which usually uses very small quantities of yeast.
The 0.2% instant dry yeast suggested in the recipe is just a starting point. You may have to adjust that depending on the room temperature (dough ferment much faster at 25°C than 20°C) or leave the dough longer before putting it in the fridge.
Yeast and fermentation time is a pretty complicated topic and there are a bunch of factors that affect the fermentation time. The most important is temperature, but also salt content in the dough, hydration, humidity, etc.
I, therefore, encourage you to try, and adjust the amount of yeast or leave the dough longer or shorter at room temperature. Good luck! 🙂
Hello;), many, many thanks for pizza heaven, it is the holy grail for me. I have been looking for a long time, for a site like this and finally found it, I am sooooooo happy:)))) I was looking for understandable explanations, such as how something works and why that is so etc and illustrated in examples.
Simply suuuuuper. Thanks a lot:)))))))
Hi,
I had trouble kneading the dough and after hours the dough was not passing the window pane test.
How do I insure that my dough kneads properly without tearing?
I am using high protein pizza flour and I think that my dough was not wet enough as I might have added extra flour to help when kneading.
Thanks
Hi,
Sorry about my question earlier, your guide actually says where I have gone wrong.
“The reason you want to leave the dough before kneading is to let the gluten hydrate, and start developing, This step is called aytolyse, and will help develop a more stretchy pizza dough.”
I did not leave the dough to rest and started kneading right away, is this the reason that my dough tears?
Thanks
Hi! I hope you figured it out. It could be part of the reason. Gluten should develop with kneading + time, whether you rest the dough or not. But I find it easier to work with the dough, and that you need less kneading if you do the autolyse step first. It could also be the flour if you use weak flour.
Thanks for the detailed information and explanations. Really well put together article. One question I have is if I wanted to double the recipe, is it as simple as x2 per ingredient amount? I often times entertain large parties and will usually go through 8+ pizzas.
Thanks again!
Mark
Yes, simply double all the ingredients to double the dough.
Great article! All went well – I left the dough in the fridge for a full 3 days. Only concern is that the rim of the pizzas didn’t puff up that much during baking and so I didn’t get the fully crispy/chewy crust. I was able to get my stone to about 580 degrees and ambient temperature around 550 degrees. I baked for 7-8 minutes. I weighed out all ingredients and used the specific Caputo active dry yeast in your article as well as the 00 flour. Any tips on why I didn’t get the puffed ring? Would adding a little more yeast help?
Thanks!
No oil ever in Neapolitan dough!!
This recipe is simply the best!! Thank you so much for sharing your recipe and expertise. I live in an area where delicious pizza is not easily accessible. I wonder if I can make several dough balls at one time and then freeze them for use later? Should I cold ferment in the fridge for 3 days and then freeze ? Should I vacuum seal the dough balls? Any thoughts/suggestions are appreciated. All the best – Fran
Seeing on other places on the web, BIGA 100% of flour at start but you add 20%+ later. Is this because it’s a longer double ferment ?
Confused when using a home oven and a pizza steel.
1) Do you heat everything up using the broiler for an hour and then cook pizza on top rack using just the broiler ?
or
2) Heat steel up using bake function for an hour and then switch to broil when ready to bake ?
or
3) Heat steel up with bake function and when ready bake halfway and then switch to broil ?
All cooking done on highest shelf so no moving steel around in the oven ?
Thanks
Hi, cold fermentation and biga are not quite the same. Cold fermentation is a method to slow down the yeast to get a longer, slower rise. Biga on the other hand is a pre-ferment. So biga can be cold fermented as port an indirect dough (a two-step process preferment + mixing of the actual dough). This, however, is a direct dough recipe, (mixing all ingredients at the same time).
Every oven is a bit different, so you may have to experiment to get the best possible result using a pizza steel.
I’ve found the best result in my oven when I place the pizza steel on the top rack and preheat it on the hottest setting for 1 hour. I usually use convection for preheating. And turn on the broiler the last 15 minutes of preheating to get the steel extra hot. So, 45 min convection, then 15 minutes of convection + broiler.
No, you shouldn’t move it around in the oven. The top rack should be fine both for preheating and baking, since you use the broiler.
I have been making your recipe for a while using 00 flour Granoro brand. Last few batches bubbles have developed at the cold fermentation stage. These are like bubble gum bubbles very thin skin and almost transparent. Only using 1-2 G dehydrated yeast. After bulk fermented for 2 hours the dough was 25C so put in fridge to get temp down. Have reduced kneading time. I can’t figure out how to eliminate the bubbles. They grow and burn in the Breville oven.
I recently purchased the Chef’s Flour and I’m wondering how successful a pizza will be if I find I don’t have the two or three days to allow the dough to ferment, i.e. used the dough the same day or next day. What result would I get? Thank you.
You can absolutely use Caputo Chef’s Flour for shorter fermentation times too. I’m actually making a next-day dough with the flour right now 🙂
Andreas, thank you so much for the fast response. I’m relieved and very happy to know it can be made without the long cold fermentation time. I have a feeling I’ll be using that more than the 3-4 day fermentation. 🙂
Was so looking forward to this. Bought caputo 00 flour as recommended. What in heavens is 1g of dry yeast in tspns? Digital scale doesn’t pick up such a small individual item like 1g of yeast. I bought, I measured, I weighed, I trusted cold fermentation process EXACTLY as recipe instructed! On the 3rd day, looking soooo forward to this pizza BUT the dough was as flat as a pancake. 2 hours, 3 hours 4 hours. This is the most wasted time and good ingredients of anything I ever made and I am a very good cook and baker. I should never have strayed from my Lidia Bastianich pizza dough!!! ARGH really angry!!!
Q
I’m really sorry to hear that the pizza didn’t turn out well!
The dough balls will relax and spread out pretty flat when left for 3 days, but they should not be flat as a pancake. It could be a lack of kneading and gluten development. You can also try to leave whole the dough in the fridge for 1 or 2 days, then ball, before placing the dough back in the fridge for the remaining part of the fermentation. Caputo Chef’s Flour should have plenty of strength for a 3-day fermentation.
Another potential problem is that the fridge is too cold. The yeast will not be active at all, and the dough will not rise. This can be solved by a longer rise before placing the dough in the fridge or using more yeast (to get a proper rise in the amount of time listed in the recipe).
Regarding the measurement of yeast, a more accurate kitchen scale is useful (more about scales for pizza baking here). Another method to accurately measure small quantities of yeast is to dilute the yeast in water. For example, 10g of yeast in 90g water will give you a yeast mix of 100g (with 10% yeast). If you add 10g of the yeast mix, that’s 1g of yeast (just keep in mind that the water in the dough should be reduced accordingly).
If you’re interested in experimenting more with cold fermentation, you can also just try your regular pizza dough and place it in the fridge overnight and see how it turns out. And gradually experiment with longer cold fermentation. Good luck with your pizza baking!
Seems more like a YOU problem.
I have made this multiple times and with little baking experience, I have made wonderful dough…
OR
You are uncleverly shilling for the dough recipie you mention… one star because you can’t follow directions. Really?
Either way, not everyone is going to be good at everything and you should probably order domino’s next time…
Hey there. Can I make this dough and then freeze it? Instructions would be appreciated!
Hey, take a look at the bottom of this article: https://thepizzaheaven.com/how-to-store-pizza-dough/ 🙂
If I use Active dry yeast can I still follow the dane method?
Yes, absolutely! 🙂
Andreas, I’ve learned so much from your website, thank you for all that you share. By far the best and most comprehensive one-stop pizza resource online! Have one comment regarding the kneading times for the Cold Fermented Pizza Dough. In the ‘Recipe’, you suggest a 10-15 minute knead with a stand mixer and 20 minutes for hand kneading whereas in the paragraph ‘1 Making the Cold Fermented Pizza Dough’, you suggest a 5 minute knead with a stand mixer and 5-10 minutes for hand kneading. Can I assume that the shorter kneading times are in order given the longer ferment?
Currently in the middle of fermenting my balls (of dough!). Will report back with results
Noticed a typo though – “Amazon Pizza” rather than “Amazing Pizza”? (Or is it a SEO trick?)
Haha, that was a typo (maybe it does something for SEO though… you never know!). Thank you for letting me know, I’ve fixed it.
Do you also recommend the chef flour, for high temp ovens? Like a Rox box?
Yes, I’ve used Chef’s flour in my Ooni at 800F+/430C+ quite often. But if you intend to use this recipe in a high temp pizza oven, you should skip the oil, since it will make the crust bake and burn too fast.
My gas oven can be on either bake, up to 505, or Broil Hi/Lo. I think Broil just leaves the element on non-stop.
Which should I use? Thinking bake to get it hot, the broil on Hi to get it hotter as I make the pizza, then back to bake at 505 on top rack with stone?…
Every oven is a bit different so you have to experiment to find the best settings. But I usually preheat my pizza stone or steel at the top rack (I guess you can use the bake setting for that), then turn the broiler on the lowest setting (mine get very hot at the highest setting, and will burn the pizza too fast) a couple of minutes before I bake the pizza to make sure the stone or steel is as hot as possible before launching the pizza.
Hello, I would like to try this recipe out, but had a few questions. Can I use active dry yeast instead of the instant yeast that is in your recipe? Also after cold proofing the dough balls for 3-5 days, can I immediately take them out of the refrigerator and freeze them to store or should they thaw at room temperature for a few hours prior to freezing them?
Thanks!
Hi! Yes, you can use active dry yeast instead. And you don’t need to let them come to room temperature before freezing. It’s actually easier to freeze the dough balls when they are cold, straight from the fridge, because the dough will be way softener at room temperature.
Hello Andreas,
Thanks for your feedback. If wanted to double or triple this recipe to cold proof, would I also double or triple the amount of yeast?
Yes, that should work! If you want to 5x or 10x the recipe, you may reduce the yeast a bit.
hi andreas, i use instant dry yeast. it comes in 7 gr packaging labeled for 500 gr. of flour. if i take 1 gr. of it i think there will be no process at all. on the other hand when i use the 7 gr. for 500 gr of flour the fresh dough is perfect but when i freeze it and then defrost slowly in the fridge it almost every time goes over-proofed.
Did you try 1g? Cold fermentation, especially if your going for several days, doesn’t require much yeast. But if you have too little activity with 1g, you can always try with 2g or 3g. It depends a little bit on the temperature of your fridge and the type of yeast as well, so it may require a little bit of experimentation to dial in the process perfectly.
Hello Andreas,
I know you suggested Caputo Chefs flour as the best one to use for long fermentation. King Arthur 00 Pizza flour was at my local grocery store and is the only 00 flour they sell. However I am not sure what the protein content is and if its even strong enough to cold proof. Another store I visited has Anna Napoletana Tipo 00.
Was just wondering if you had a chance to experiment with King Arthur 00 Pizza Flour or Anna Tipo 00 for cold proofing?
If not, I assume I should probably just try both of these starting at cold proofing for only 24 hours and then form/cook the pizza to see how they turn out:)!
Thanks again!
How much great yeast would you use for this recipe?
Great article that I keep coming back to. A question though.
If I was to use a lower protein flour and still wanted to do a 24+ fermentation can I not just use less yeast or am I missing something!?
Jon
The problem with low protein flours is that they are not as strong as higher protein flours. So you may not be able to develop a strong enough gluten network in the dough, which is what gives the dough structure. This gluten network is what allows the dough to hold on to the gas from the yeast. So if you use waker flour with less protein you run the risk of the dough collapsing.
You can always give your flour a try, I have cold fermented pretty weak pizza flours and all-purpose flours for more than 24 before. But if you don’t have pizza flours available is bread flour a great alternative, since they often are strong.
Hi Andreas
Still need to try out your way of making a cold fermented dough. Have been using the poolish method ranging from 65-68% hydration in home oven with steel with a steel temp of 320°c/608f.
I read in one of your answers that the fridge would be at 15°c but I hope you meant 5°c/41f?
Hi, 15°C is a common rising temperature for Neapolitan pizza dough, but you do regular cold fermentation in the fridge!
When you place the dough in the fridge (below 5-10°C / 40-50°F) is that the dough will almost stop rising. But there are other maturation processes that will still happen at these temperatures, which will improve the flavor of the dough.
Firstly, I’m new to long fermentation so I’m sure with some guidance and practice I’ll be able to fix the problem, however after having read through all the material you’ve posted I still don’t seem to be able to get this to work. The problem is the stickiness of the fermented dough. I’ve used the recipe you provided (inc. the Caputo Cuoco flour), kneaded it with a bread hook until all mixed, left it in the fridge for 5 days (in which time it rose and bubbles formed, so showed all the right signs), however when I went to take it out of the container from the fridge the mixture was extremely sticky (ie stuck to the bottom of the container when upturned and over a few minutes slowly stretched down and I needed to scrape the mix from the bottom of the container to release it all). On a floured workbench, the dough kept sticking to my fingers when I went to stretch it. I dusted it with flour to try to dry it out however it was not really that successful. When I attempted to push the pizza peel under the dough the whole thing just bunched up as it stuck to the workbench. It was a disaster. I then pulled it apart and remade it on the pizza peel (also dusted with flour) and then it would not leave the peel to go onto the pizza stone as it too was too sticky. Somewhere along the line some thing(s) were not right, so would you kindly list (in order) what to do to try to get to something which is workable, pls?
Hi, I’m sorry to hear things didn’t turn out right.
There are many things that can lead to a sticky dough. The first thing you can try to do is lowering the hydration, so use 60% water instead of 64%. Kneading the dough more will also create it a bit less sticky.
To make it easier to get the dough balls out of their rising containers, you can oil them.
When I get my dough balls out, I place them in a pile of flour, turn them, and start pressing the dough into a small disk in the flour to make sure any sticky part of the dough is completely covered in flour. Then I move the dough to another part of my kitchen countertop and continue to stretch out and shape the dough. Then I stretch the dough a little smaller than I want my final pizza to be. So for a 12-inch pizza, I stretch it to around 10 inches. The reason is I don’t want the bottom to be too thin because then it’s easier to make a hole in the dough when I move it to the peel
Then top the pizza quickly (if you let it sit longer it will start to stick more), make sure to not overtop it.
Dust your peel and get it under your pizza. Do final stretching to make it 12 inches, and quickly launch it onto my pizza stone or steel.
Another thing to consider when making slow-rise dough is that the dough gets very relaxed when you leave it for days to ferment. This means it will be less elastic and can stretch too easily. And the result can be that you stretch the dough too thin. When adding sauce and moist topping to the pizza, this moisture will be absorbed by the bottom, and if it’s super thin, it can make the pizza stick to the work surface. And then it’s so relaxed and thin, it’s also easy to make holes with the pizza peel. If this is a problem, I recommend taking the dough out and reshaping the dough balls 8-12 hours before pizza baking. This will tighten the gluten a bit and make the dough more elastic.
Hi Chef! I am a little confused…I have a pizza steel, so are you saying that I should heat up the steel for an hour with just the broiler on? Cause in my oven you can’t use the broiler and oven at the same time. And then after an hour just cooking the pizza with the broiler on? I have been using the steel on the middle rack with the oven set at the max temp of 500 , I get a nice crispy bottom but I find that the bottom is a little hard too. (a little tough). I am going to try your dough this week. Any reply would be really helpful, thank you, Maria
Hi! Every oven is a bit different. If you can’t use the oven and broiler at the same time, just heat the pizza steel on the oven setting. I can use both at the same time on mine, so I usually turn on the broiler too, the last 5 minutes to get the steel extra hot before baking.
It’s a bit hard to give advice on the bottom since I’m not sure exactly what you’re looking for, but I like to bake my pizza fast and hot. That creates a crispy bottom without drying the interior out too much.
How scaleable is it? For say 6 or 8 dough balls?
It’s scalable. Simply multiply the ingredients by 1.5x for 6 dough balls or 2x for 8 dough balls.
Hi, I made the dough yesterday and it’s in the fridge now. The dough does not seem to have risen much and there are few gas bubbles. Is this due to long fermentation or possibly something I did. The dough looked and felt great when I made the dough balls. I doubled the recipe and made four 15oz dough balls. TY… I’ve really enjoyed reading this article and all the comments.
I’m happy to hear that!
Andreas,
I am confused. I used your recipe on this website. Using 1g of instant yeast and covered it to Active dry yeast. After about 1.5 hours, I noticed that the dough did not rise too much. After reading the comments here, it seems that is was a typo and it should have been 1g of active dry yeast. This means that my dough has too little yeast and will not rise substantially. If this is the case, things are not off to a good start and my dough has to be scrapped.
Please confirm,
Recipe
500 g tipo 00 flour
320 ml water
10 g salt
1 g instand dry yeast
10 g extra virgin olive oil
Andreas,
You can ignore my previous post. I Just realized that using 1g of instant yeast = 1.35g of active dry yeast. I had my conversion backwards. So if indeed it is a typo and should be 1g of active dry yeast, then I am using a little more.
Please confirm.
At what point can this recipe be frozen and for how long?
Yes, it can! And should be good for around 6 months.
Andreas
This turned out perfect! Thanks
I’ve used this recipe several time the last few months, ind it’s a recipe I keep coming back to.
How big of a pizza does the 4 balls make? Also once assembled can you freeze the pizza to bake later?
This recipe yields 4 pizzas of around 30cm or 12 inches.
Yes, you can freeze the dough and bake it later. But I find the result to be better if you don’t freeze the dough.
Hello. I enjoyed making this recipe. I found that after the cold fermentation (for 4 days), the dough balls had lost their shape and weren’t round as they had spread together in the proofing box. Should I reshape the dough balls when I take them out of the fridge (a couple of hours before cooking)? Thank you. Richard
Yes, you can. But I would advise you to re-shape them a few hours before you plan to make pizza. Because then you re-shape them, the gluten will tighten up, making the dough balls more elastic. So when you try to stretch them out, they will spring back. I recommend to let the dough ball relax for at least 4 hours before you stretch your pizza.
Alternatively, you can cold ferment the dough in bulk for 3 days, and divide it into dough balls the day before. Then the dough balls will not spread out as much.
I’m making pizza dough for 30 people at my brother place who has a pizza oven. Can I cold ferment the dough in one container at my home and roll and rest at my brothers place prior to cooking?
Yes, you can, but I would advise you to split the dough into dough balls and let them rest a few hours before stretching and baking the pizzas. When you make dough balls the gluten will get tighter, making the dough balls elastic so they spring back when you try to stretch the dough. But if you let them rest for at least 3-4 hours (or even longer if possible), the dough should be easy to work with.
I don’t own a pizza stone, and I’d say that is crucial for this recipe. My pizza turned out terrible but that is my fault
Great recipe!
Thanks for all the great info. I am a little confused about how much it makes (cut the dough into 4 balls, stretch each to 12 inches: serving size). So for each recipe I can make 4 twelve inch pizzas? I am having a dinner party with 7 adults on Monday and have made 3 recipes. It seems like that should be enough but would appreciate any thoughts.
Thank you!
Looking forward to this!
I know semolina is typically used for the peel but….
Flouring the dough before stretching…. do you use semolina or pizza flour?
I use mostly semolina because it’s easier to get off the pizza, and therefore reduce the risk of burnt flour in the oven.
If I want to make a big batch for later at what point do I freeze the dough? After bulk fermentation? After balling and chilling?
Thanks! Great recipe and technique
I usually freeze the dough after balling, you can read more here: thepizzaheaven.com/how-to-freeze-pizza-dough
Perfect!