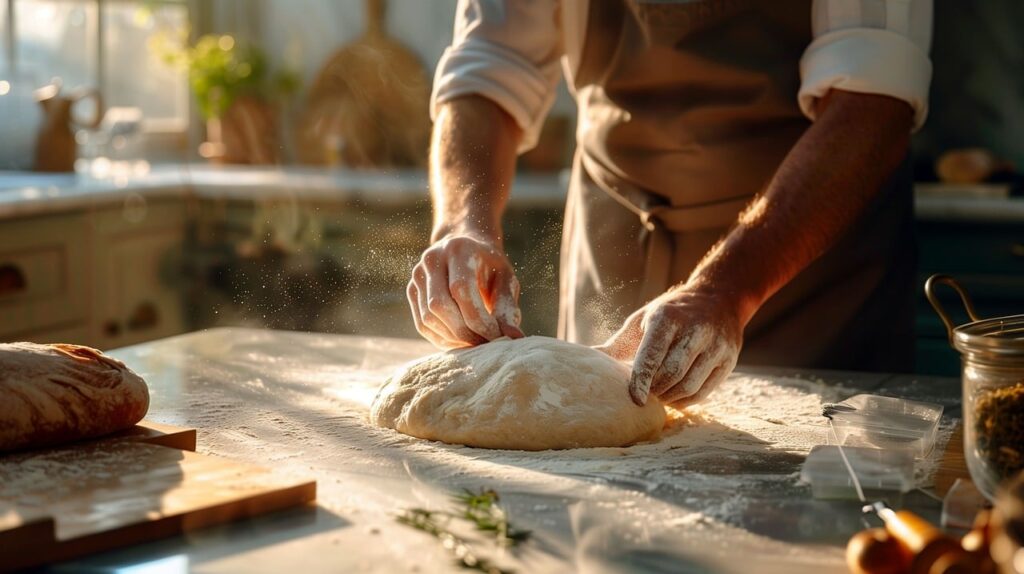
If you’re serious about making the best pizza at home, mastering the technique of autolyse for your pizza dough will be a game-changer.
Autolyse is a simple yet transformative step that can significantly improve the texture and flavor of your pizza dough. By incorporating the autolyse method, you can achieve a dough that’s easier to stretch, more elastic, and packed with complex flavors.
In this guide, we’ll dive deep into everything you need to know about autolyse pizza dough, helping you elevate your pizza-making skills to new heights.
What is Autolyse in Pizza Dough?
Autolyse is a technique in dough making where flour and water are mixed together and allowed to rest before adding other ingredients like yeast and salt. This simple process can significantly enhance the dough’s texture and flavor by allowing the flour to fully hydrate and the gluten to begin forming naturally. Incorporating autolyse into a basic pizza dough recipe can elevate the quality of your dough.
The term “autolyse” was introduced by French baker Professor Raymond Calvel, and it has since become a fundamental step in artisanal baking. Originally used to improve bread, autolyse has been adapted for pizza dough with great success.
During the autolyse process, flour absorbs water, which activates enzymes that break down proteins and starches. This early enzyme activity aids in gluten development and makes the dough more extensible. Essentially, autolyse allows the dough to start forming its structure naturally, reducing the need for extensive kneading and preserving the dough’s natural flavors.
By incorporating autolyse into your pizza dough preparation, you can achieve a crust that’s tender yet strong, with enhanced fermentation characteristics and a rich, complex flavor profile.
What Does Autolyse Do to Your Pizza Dough?
The autolyse process involves mixing flour and water to form a shaggy dough, then allowing it to rest. During this rest period, several important chemical and physical changes occur that improve the dough’s quality.
Hydration of Flour
When flour and water are combined, the flour begins to hydrate. This means the water is absorbed by the flour particles, which helps to soften the starches and start the formation of gluten. Proper hydration is crucial because it makes the dough easier to handle and knead.
Formation of Gluten Structure
One of the key benefits of autolyse is the enhancement of gluten formation and development. Gluten is the network of proteins that gives dough its elasticity and strength. During the autolyse period, enzymes in the flour, such as proteases, break down proteins into smaller peptides, which helps to soften the dough and improve its extensibility. This results in a dough that is more extensible and less likely to tear when stretched.
Breakdown of Starches into Simpler Sugars
Enzymes called amylases break down starches in the flour into simpler sugars during the autolyse period. These sugars serve as food for the yeast when it is later added, promoting better fermentation and contributing to the dough’s flavor and browning during baking.
Benefits of Autolyse in Pizza Dough
Incorporating autolyse into your pizza dough preparation offers several notable benefits that can transform your homemade pizza.
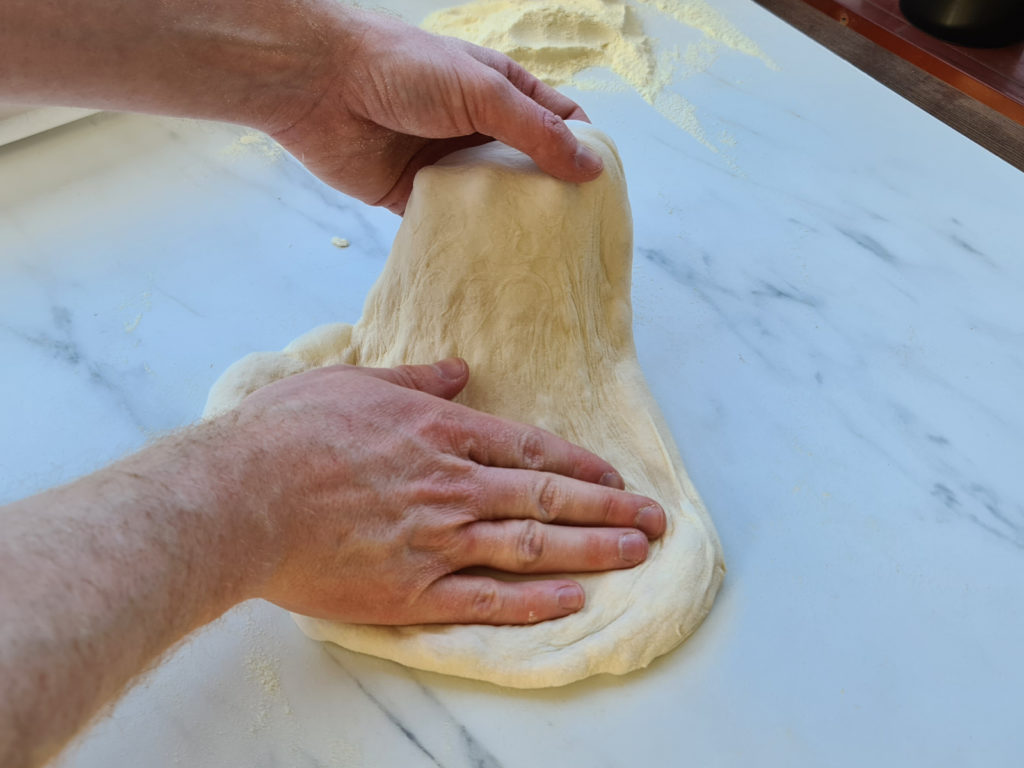
Improved Dough Extensibility and Ease of Stretching
One of the primary benefits of autolyse is the improved extensibility of the dough. By allowing the flour and water to rest, the gluten network forms more effectively and becomes more aligned. This results in a dough that is easier to stretch and shape without tearing, making it ideal for creating thin, uniform pizza crusts. Additionally, handling wet dough can further enhance extensibility due to higher hydration levels.
Enhanced Flavor and Texture
Autolyse also enhances the flavor and texture of your pizza dough. The enzymatic activity during the rest period breaks down proteins and starches into simpler compounds, which contribute to a more complex flavor profile. Additionally, the reduced kneading time preserves more of the dough’s natural flavors and pigments. However, enzymatic activity can sometimes lead to an overly sticky dough, which can be managed by kneading and using techniques like the French ‘stretch and fold’ method.
- Softer and More Elastic Dough: The improved gluten structure makes the dough softer and more elastic, leading to a tender yet chewy crust.
- Better Browning and Crust Development: The breakdown of starches into simpler sugars provides more food for the yeast, promoting better fermentation. This results in a crust that browns more evenly and develops a beautiful, flavorful exterior.
Overall, using autolyse in your pizza dough preparation can lead to a more enjoyable and successful pizza-making experience, with a dough that’s easier to handle and a final product that’s flavorful and visually appealing.
Autolyse vs. Not Using Autolyse
To truly appreciate the benefits of autolyse, it’s helpful to compare pizza dough made with and without this technique. Here’s a side-by-side comparison highlighting the differences in texture, flavor, and ease of handling.
Texture and Structure
- With Autolyse: Bread dough with autolyse is more extensible and easier to stretch without tearing. The gluten network forms more naturally and evenly, resulting in a tender yet chewy crust with a beautiful open crumb structure.
- Without Autolyse: Bread dough made without autolyse can be tougher and more difficult to stretch. The gluten development may be less uniform, leading to a denser and less elastic dough.
Flavor and Aroma
- With Autolyse: The enzymatic activity during autolyse breaks down proteins and starches into simpler compounds, enhancing the dough’s flavor. This results in a more complex, rich taste and an improved aroma during baking.
- Without Autolyse: Dough made without autolyse might lack the depth of flavor and complex aroma. The shorter enzymatic activity can lead to a more one-dimensional taste.
Ease of Handling and Stretching
- With Autolyse: The dough is significantly easier to handle and shape. It requires less kneading, reducing the risk of overworking the dough and making it easier for beginners to achieve good results.
- Without Autolyse: Handling and stretching the dough can be more challenging. Without the benefits of early gluten development, the dough may be more prone to tearing and harder to shape.
By comparing these aspects, it’s clear that incorporating autolyse into your pizza dough preparation can lead to superior results, making the process easier and the final product more enjoyable.
When to Use Autolyse for Your Pizza Dough
Autolyse is a versatile technique that can be beneficial in various pizza-making scenarios. However, there are specific instances where it shines, as well as situations where it might not be necessary.
Scenarios Where Autolyse is Particularly Beneficial
- High-Hydration Doughs: When working with high-hydration doughs, autolyse can make the dough easier to manage. The rest period allows the flour to fully hydrate, making the dough less sticky and more workable.
- Using Lower-Protein Flours: If you’re using lower-protein flours, autolyse can help improve gluten development. This can result in a dough that’s stronger and more elastic, compensating for the lower gluten-forming potential of the flour.
- Improving Dough Handling: For those new to pizza making, autolyse can make the dough easier to stretch and shape, reducing the learning curve and improving the overall experience.
Situations Where Autolyse Might Be Skipped
- Short Fermentation Times: If you’re in a hurry and planning a short fermentation time, the benefits of autolyse may be less pronounced. In such cases, you might choose to skip the autolyse step to save time.
- Doughs Intended for Cold Fermentation: For doughs that will undergo a long, cold fermentation, the extended resting period can compensate for the lack of autolyse. The slow fermentation process allows for adequate gluten development and flavor enhancement without the need for an additional autolyse step.
Understanding when to use autolyse can help you make informed decisions based on your specific pizza-making needs and preferences. By incorporating this technique when appropriate, you can optimize your dough’s performance and achieve consistently excellent results.
How to Make Pizza Dough Using Autolyse: Step-by-Step Process
Making pizza dough using the autolyse method involves a few simple steps that can greatly enhance your dough’s quality. Here’s a detailed guide to help you through the process.
Ingredients
- Flour: Preferably Tipo 00 or high-protein bread flour
- Water: Precise hydration levels (typically 65-70% hydration)
- Active dry yeast: Added after the autolyse period
- Salt: Added after the autolyse period
Step-by-Step Instructions: How to Autolyse
- Mix Flour and Water:
- Combine the flour and water in a mixing bowl.
- Stir until you have a shaggy dough, ensuring all the flour is hydrated.
- Let the Mixture Rest (Autolyse):
- To autolyse, cover the bowl with a damp cloth or plastic wrap and let the dough rest for 20-60 minutes. During this time, the flour will fully hydrate, and the gluten network will begin to form. This technique reduces mixing time, increases extensibility, and can enhance the flavor of the dough.
- Add Yeast and Salt:
- After the autolyse period, sprinkle the yeast and salt over the dough.
- Mix thoroughly until both ingredients are fully incorporated. You can knead the dough by hand or use a stand mixer with a dough hook attachment.
- First Fermentation (Bulk Fermentation):
- Place the dough in a lightly oiled bowl and cover it.
- Let it ferment at room temperature until it doubles in size. This typically takes about 1-2 hours, depending on the room temperature and the amount of yeast used.
- Shaping and Final Proofing:
- Once the dough has fermented, divide it into individual portions for your pizzas.
- Shape each portion into a ball and place them on a floured surface or in a proofing box.
- Cover and let them rest for an additional 1-2 hours for final proofing.
- Baking Tips:
- Preheat your oven to its highest setting, ideally around 500°F (260°C) or higher.
- If using a pizza stone or steel, place it in the oven to preheat as well.
- Stretch each dough ball into a pizza base, add your desired toppings, and bake until the crust is golden and the toppings are cooked. This usually takes about 7-10 minutes in a home oven, or 1-2 minutes in a professional
pizza oven .
By following these steps, you can make high-quality pizza dough using the autolyse method, resulting in a crust that’s easy to work with and full of flavor.
The Science Behind Autolyse
Understanding the science behind autolyse can help you appreciate why this technique is so effective in improving pizza dough. Here’s a detailed look at the biochemical processes involved.
Role of Enzymes in Breaking Down Proteins and Starches
During the autolyse period, two main types of enzymes play crucial roles: amylases and proteases.
- Amylases: These enzymes break down starches in the flour into simpler sugars. This not only provides food for the yeast, promoting better fermentation, but also enhances the browning and flavor of the crust during baking.
- Proteases: These enzymes break down some of the proteins in the flour into simpler compounds. This makes it easier for gluten strands to form and align, which is essential for developing the dough’s structure.
In various dough recipes, the autolyse technique improves texture and flavor through enzyme activity, leading to better gluten development and overall dough quality.
How Autolyse Helps in Gluten Development
Gluten is a network of proteins that gives dough its elasticity and strength. During autolyse, the breakdown of proteins by proteases facilitates the formation of a more cohesive and extensible gluten network. This early gluten development reduces the need for extensive kneading, which can oxidize the dough and diminish its flavor.
Impact on Dough’s Final Properties
- Enhanced Dough Strength and Extensibility: The improved gluten network makes the dough stronger and more extensible, which is crucial for achieving a thin, stretchable pizza crust that doesn’t tear easily.
- Improved Moisture Retention: Fully hydrated flour during autolyse helps the dough retain moisture better, resulting in a softer and more tender crumb.
- Better Fermentation: The simpler sugars produced by amylases during autolyse provide a more readily available food source for the yeast, leading to a more efficient and effective fermentation process.
By leveraging the science behind autolyse, you can create pizza dough that not only performs better but also tastes superior, with a perfect balance of strength, extensibility, and flavor.
Optimal Resting Times
The ideal autolyse period typically ranges from 20 to 60 minutes. However, the exact duration can vary based on the type of flour and the hydration level of your dough.
- For High-Protein Flours: A shorter autolyse time of 20-30 minutes is usually sufficient, as these flours absorb water quickly and start forming gluten efficiently.
- For Lower-Protein Flours: Extending the autolyse period to 45-60 minutes can help compensate for the lower gluten-forming potential and improve dough strength.
Many professional and home pizza makers have adopted the autolyse technique to enhance the texture, flavor, and overall quality of their pizza dough.
Common Autolyse Mistakes to Avoid
Avoid these common pitfalls to ensure your autolyse pizza dough turns out perfect every time.
Over-autolysing
Resting the dough for too long can lead to overhydration of the flour, which might make the dough too slack and difficult to work with. So, stick to the recommended autolyse times.
Improper Mixing Techniques
Make sure to mix the flour and water thoroughly to ensure all the flour is hydrated. A poorly mixed dough can lead to uneven gluten development and inconsistent results.
Using Too Cold Water
Always use room temperature water for autolyse. Cold water can slow down the hydration process and enzymatic activity, resulting in less effective autolyse.
Skipping the Rest Period
The rest period during autolyse is crucial. Skipping it or cutting it too short can lead to a dough that doesn’t benefit fully from the process, making it harder to work with and less flavorful.
Adding Salt or Yeast Too Early
Salt and yeast should be added after the autolyse period to allow the flour to hydrate fully and the gluten to develop without the interference of salt and the fermentative activity of yeast.
Frequently Asked Questions (FAQs)
Can you autolyse with whole wheat flour?
Yes, you can autolyse with whole wheat flour. In fact, autolyse can be particularly beneficial for whole wheat doughs because it helps to hydrate the bran and germ in the flour, making the dough more manageable. However, whole wheat flour may require a longer autolyse period (around 30-60 minutes) to fully hydrate.
How long can you extend the autolyse period?
Typical autolyse period ranges from 20 to 60 minutes, but some bakers extend it up to 2 hours, especially when working with high-hydration doughs or lower-protein flours. However, extending the autolyse too long can lead to overly slack dough, as the enzymes might break down too much gluten, weakening the dough’s structure.
What’s the difference between autolyse and bulk fermentation?
Autolyse is a pre-fermentation step where only flour and water are mixed and rested, allowing enzymes to start breaking down proteins and starches. Bulk fermentation, on the other hand, involves the entire dough mixture, including yeast and salt, fermenting to develop flavor and texture. Autolyse primarily improves dough extensibility and initial gluten development, while bulk fermentation builds flavor and final dough structure.
Can you autolyse in the refrigerator?
Autolyse is typically done at room temperature to maximize enzyme activity. Doing it in the refrigerator can slow down these processes significantly. If you need to refrigerate the dough during autolyse for scheduling reasons, be prepared for the autolyse period to take much longer.
Do you need special flour for autolyse?
No special flour is needed for autolyse. While high-protein flours like bread flour or Tipo 00 flour are commonly used for pizza dough, the autolyse technique can be applied to a variety of flours, including all-purpose and whole wheat flours.
Is autolyse necessary for all types of pizza dough?
A good pizza dough recipe often includes the autolyse technique, which is beneficial for most types of pizza dough, especially those requiring high hydration or longer fermentation periods. However, for quick, low-hydration doughs or recipes requiring short fermentation times, autolyse may not be necessary.
Conclusion
Incorporating the autolyse technique into your pizza dough preparation can transform your homemade pizza experience. By allowing the flour and water to rest and hydrate before adding other ingredients, you enhance the dough’s texture, flavor, and manageability.
Autolyse helps to develop a strong yet extensible gluten network, resulting in a dough that is easier to stretch and shape. The enzymatic activity during the autolyse period breaks down proteins and starches, contributing to a more complex flavor profile and better browning during baking.
Whether you are a novice home baker or an experienced pizza maker, using the autolyse method can lead to consistently excellent results. The improved dough strength, moisture retention, and flavor make it well worth the extra time and effort.
Try incorporating autolyse in your next pizza-making session and experience the difference it can make. Your pizza will have a tender, flavorful crust that is sure to impress.
By mastering this technique, you can elevate your pizza game and create restaurant-quality pizzas in the comfort of your own kitchen.

- Neapolitan Pizza Dough Planner - June 7, 2026
- Is Your Pizza Dough Too Dry? Here is How to fix it! - June 10, 2024
- The Ultimate Guide to the Pizza Dough Windowpane Test - June 8, 2024