Are you wondering what proofing your pizza dough actually means? Or maybe how to do it correctly. This article will show you everything you need to know to prove your pizza dough to perfection.
What is proofing of pizza dough?
Proofing also, called proving, is a step in the pizza-making process where the dough is allowed to rest and rise before baking. What’s happening when you’re proofing your dough, is that the yeast eats the sugars in the dough, and converts it to CO2. This is what makes the dough increase in volume. It also gives the crust more complex flavors.
Proofing, rising, or fermentation?
There is a lot of confusion out there when it comes to the different terms people throw around describing this process. You hear proofing, rising, and fermentation, but they all essentially mean the same. Simply describe the yeast converting sugars into CO2, inflating the dough.
What is rising?
The phrase rising is however most commonly used to describe the first, initial leave, where the main goal is to increase the volume of the dough. This step is often also referred to as bulk fermentation.
What is proofing?
Proofing, on the other hand, is most commonly used to describe the second, final rise of the dough.
What is fermentation?
Fermentation is actually a description of the chemical process, where enzymes break down carbohydrates (sugar) into CO2.
How to proof pizza dough in 5 easy steps
Proofing pizza dough is a two-step process consisting of bulk fermentation, followed by proofing each individual pizza dough ball. But in addition to that, you need to make the dough, knead it, and make dough balls. So let’s get started!
1. Make the dough
The first thing we need to do is to make the dough. I have several pizza dough recipes on this website, so I’m not going to go into details on how to make the dough here. I recommend trying Authentic Neapolitan Pizza Dough. This will give you an amazing pizza crust that’s light and soft on the inside, and nice and crispy on the outside.
2. Kneading the dough
Kneading the dough is one of the most important steps, but often a step that’s overlooked. Many people make the mistake of not kneading their dough enough. And this will lead to problems down the road when you’re going to start raising the dough.
When you knead the pizza dough, the gluten in the flour will develop, and create a network of small walls. These walls will trap the CO2 created by the fermentation process, where yeast is eating the sugars in the flour. It’s therefore important to develop gluten properly, to create strong enough walls to hold the CO2. This is done by kneading the dough. The more you knead the dough, the stronger the gluten walls are going to get. And the stronger the walls are, the more the dough will keep its structure and shape.
If you don’t knead the dough enough, it’s not going to be able to hold on to the CO2. The reason is that the walls aren’t strong enough, and the CO2 will escape. You will then end up with a dense dough that’s not great to work with. You’ll also not get the light, fluffy consistency that we’re looking for in a pizza crust.
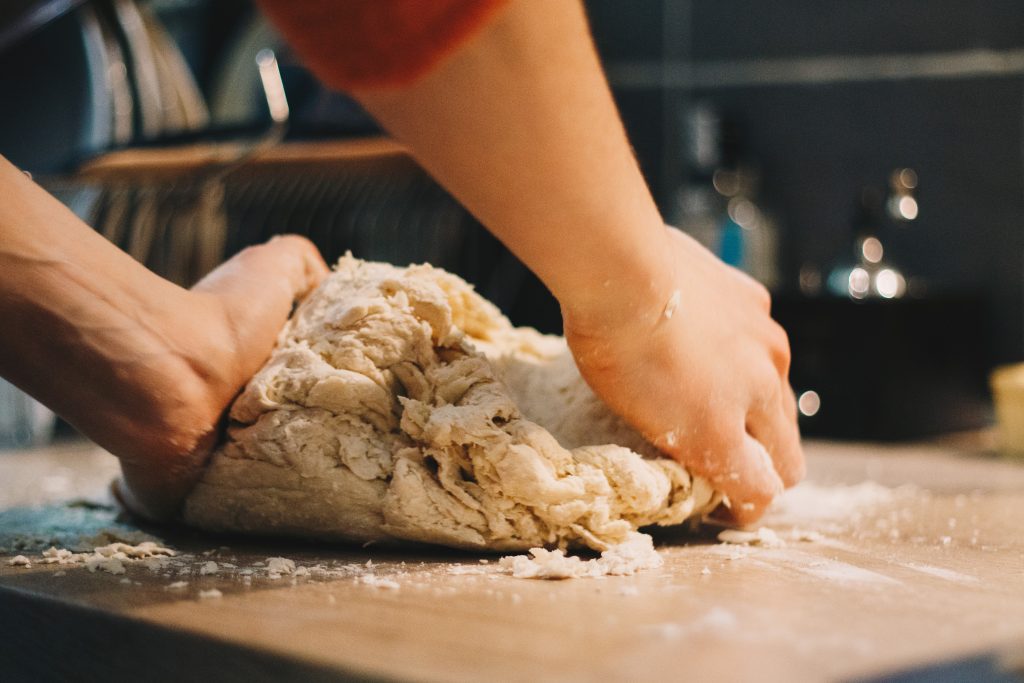
Kneading the dough requires more work than you might think. The kneading time depends on the type of flour (or rather the gluten content of the flour) you’re using. But to achieve proper gluten development using a typical Tipo 00 flour, will take around 20 minutes by hand. Similarly, with a stand mixer at low speed, you’ll need around 10-15 minutes.

Gluten hydration and autolyse
Gluten will develop simply by hydrating. When you leave the dough to rise for an extended period of time, the gluten will develop over time. It is possible to make no-knead dough but applying mechanical work through kneading will affect how the gluten structure develops. And this will make a stronger gluten structure, that will keep its shape better.
Autolyse is a technique used in bread baking where you mix only the water and flour, and leave it to hydrate for 15-30 minutes before kneading. This will give the gluten a headstart, and shorten the kneading time.
3. Bulk fermentation
The next step is called bulk fermentation. In this step, you let the dough rise in one, single mass. It’s during bulk fermentation that most of the increase in volume will happen. The reason is that yeast works better in one single dough, rather than in individual, smaller dough balls.
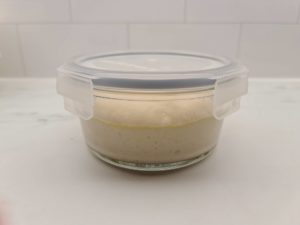
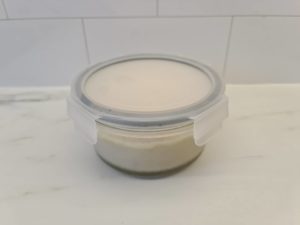
To bulk ferment your dough, simply place it in an airtight container or a bowl covered with plastic wrap. You want it to be airtight to prevent the surface of the dough from drying out. Depending on the type of dough you make, bulk fermentation can be anything from 2 to 24 hours.
4. Balling
Now it’s time for balling. Balling simply means dividing the dough into individual dough balls, one for each pizza.
Start by knocking down the dough. This will deflate the dough, which helps redistribute the yeast for a better, more even second rise. Next, simply divide the dough into dough balls, enough for one pizza each. For a Neapolitan-style pizza, this is typically 200-250g, while for a thicker crust, a 12-14-inch pizza is around 300-400g.
You can divide them into balls using:
- a dough scraper,
- a knife,
- or simply rip off the right size using your hands
Then fold the dough balls over a few times and give them a nice, smooth surface.

5. Final proofing
The last step is to proof the dough balls. This is usually the longest step in the process. You can do the final proofing either at room temperature or at a lower temperature to slow it down.
I don’t recommend proofing your dough at a higher temperature than room temperature. The reason is that you want to slow down the process, rather than speed it up. This is what creates flavor and texture for your pizza.
The ideal time for proofing and Neapolitan-style pizza at room temperature is 8-12 hours. Simply place the individual dough balls in a rising box or another airtight container.
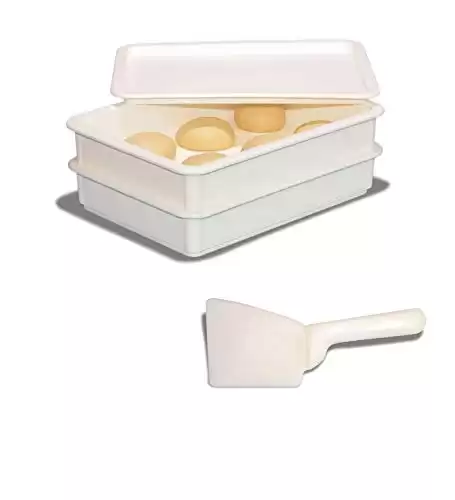
This set of 2 heavy-duty dough trays offers professional quality, each designed to comfortably fit 6 pizza dough balls. Included in the set are a fitting lid and a plastic scraper. With their small size of only 17.75 x 13 x 7 inches, these trays allow for compact storage, including in the fridge
The reason you typically, leave the dough for 8-12 hours in balls is that it takes time for the gluten to relax. When the gluten is relaxed it’s easier to stretch out the dough and form the pizza base. If the gluten is too tense the dough will be elastic and hard to shape.
How do you know when the pizza dough is proofed?
The easiest way to tell if your pizza dough is done is the poke test. In addition to that, your dough should also increase in volume.
The Poke Test
The poke test is a pretty common method used in bread baking to check if your dough is done proofing. All you need to do is lightly poke the dough to see if it springs back. Contrary to the poke test for checking for gluten development when you’re kneading the dough, the indentation in the dough will not spring back when it’s done proofing.
Check If the Volume Has Increased Enough
The second way to check if your dough is done is to check how much it has increased in volume. Most doughs should roughly double in volume. This means that if your dough has not grown much in volume yet it probably needs to proof longer.
What is the right temperature for proofing pizza dough?
The first thing we need to talk about when we are discussing proofing temperature is that the time and temperature are connected. This means, that you can control the proofing time by adjusting the temperature. At a higher temperature, the yeast will speed up, while at lower temperatures it will slow down.
The best starting point is to proof pizza dough at room temperature. But if you want to be fancy, cold-fermenting the dough, or make a Neapolitan-style pizza, you want to lower the temperature.
Proofing pizza dough at room temperature
Most pizza recipes will not state at which temperature you should be proofing the dough. But it’s safe to assume that this means room temperature, around 70-75°C (21-24°C). So, in most homemade pizza recipes, the dough should be proofing in room temperature the pizza dough in room temperature. But for how long should you proof pizza dough at room temperature?
For how long should you proof pizza dough at room temperature?
Pizza dough should be proofed at room temperature anywhere from 1 to 24 hours, and sometimes even more.
As we’ve already discussed, proofing time depends on temperature. It’s up to you how long you want to proof your dough, but generally speaking, a longer fermentation will result in a more flavorful pizza crust.
No matter which temperature you choose, the most important thing is that the temperature is consistent.
Especially if you have a long rising time, for example, 24 hours, and you leave the dough overnight the room temperature will probably drop during the night. It’s therefore a good idea to proof the dough in a place that has a consistent temperature.
Proofing pizza dough in the fridge
A great way to enhance the flavor of pizza dough is by proofing it in the fridge. This technique is called cold fermentation. And all you need to do is to leave your dough in the fridge overnight, or for up to a few days.
Cold fermentation is a method where you slow down the yeast by placing the dough in the fridge to lower the temperature. The low temperature will extend the fermentation time and give the yeast time to break down more sugars in the flour to create better more complex flavors.
Proofing in the fridge also gives you more flexibility, since a few hours more or less doesn’t make a huge difference. So if your guest is running late, or something shows up, you can simply leave the dough in the fridge for a few more hours, or even until the next day.
I’ve written an in-depth article and recipe on the topic. If you’ve never tried cold-fermenting pizza dough, I strongly recommend you do so. It makes a heavenly pizza crust! Check out the recipe here.
Proofing pizza dough in the oven
Proofing your pizza dough in the oven is a great way to control the fermentation and get a consistent result.
You can use your oven to:
- Get a more consistent temperature
- Increased temperature to speed up fermentation
- Lower the temperature to slow down fermentation
Since the oven is an insulated, closed space, it will keep a more consistent temperature than your countertop. This is particularly useful if you do longer fermentations. Overnight, for example. The temperature in your house will drop during the night, but it will drop less and slower inside your oven.
Proofing your dough inside the oven is also great when you need to adjust the temperature because your house is too hot or too cold.
If your house is too cold, you can add a glass or bowl of boiling water to increase the temperature of the oven to speed up the fermentation. You can also turn the oven on for a minute to get the boost in temperature, just be careful to not make it too hot for your yeast.
You can also place ice cubes inside your oven to lower the temperature, to slow down the fermentation. For longer fermentations, you can freeze a couple of water bottles and place them inside the oven with your dough. They will last for hours.
Proofing pizza dough in the microwave
Another alternative to proofing your pizza dough in the oven is using a microwave.
A microwave is a smaller version of an oven, that offers the same insulated box. So the temperature inside a microwave is also more consistent than on your countertop.
Similarly, you can use hot water to increase the temperature of the microwave to speed up fermentation. Or ice to lower the temperature and slow down fermentation.
Can you proof pizza dough for too long?
Yes, you can prove the dough for too long. This is what we call over-proofing. What happens when the dough is over-proofed is that it’s punctured and all the CO2 created in the fermentation process escapes the dough.
What’s happening when the dough over-proofs is that the small pockets in between the gluten walls in the dough burst. When they burst, all the CO2 will escape, leaving you with a punctured dough.
Now that we know what’s going on, how can we prevent it from happening? The time it takes for dough to over-proof depends on the strength of the flour you use. A stronger flour with more protein will create a stronger network of gluten strains that are going to hold up longer. So if you’re making a Neapolitan-style pizza that’s rising for 24 hours, you need stronger flour than for a grandma pie-style pizza, that’s only rising for 1-2 hours.
If you’re interested in Neapolitan-style pizza, I have a great experience using Caputo’s pizza flours. Caputo makes high-quality flour and is the leading supplier of pizza flour in the Naples area.
Related
- Ooni Turning Peel Review: The Best Peel for Home - April 15, 2024
- Gi.Metal Turning Peel Review: Is This the Ultimate Pizza Tool? - April 14, 2024
- Discover Pizza Mastunicola: The Story of the First Pizza - April 7, 2024
I am about to purchase an Ooni Pizza Oven and this was tremendously helpful. Thanks so much for the information and for writing it out so clearly and concisely. Will definitely be returning to your site for more information in the future. Thanks!
I am also getting an ooni oven. Once the dough is proofed is it ok to freeze it?
Yes, that should be fine! Just make sure to give the dough enough time to thaw, and come to room temperature before you use it. You can also take a look here if you want to read more about freezing and storing pizza dough.
YES! I do this all the time. With 1 cup of water, 1 TB of Olive oil and 3 cups of Bread flour I make enough dough for up to 3 (or 4) pizzas but only want to make 2. So, after the first proof I place the extra dough ball(s) wrapped up tightly in plastic wrap and place it/them into a *cold freezer. When for whatever reason I don’t make the dough the day before use, I pull out these dough balls first thing in the morning of the day of use and let them proof all day (8am-5-pm).
They DO tend to be smaller secondary balls than those not frozen overnight.
*Be sure to place your tightly wrapped dough balls into a COLD area of the freezer. I made the mistake of placing them into a freezer that took longer to freeze them than another and they actually kept on proofing before freezing and split the plastic wrap.
Hi, i have a question… something i find very difficult to understand and cant find any good information about on the internet, is the process of the dough balls management if your running a pizza business.
For example, if i made my dough balls, how do i manage them during the day in my pizza restaurant, like do i leave them outside in the proofing box or do i leave them in the fridge and take them out as i need them.?
This confuses me because my dough balls end up over proofing in matter of hours while im selling and making the pizzas.
Ive seen some pizza restaurants that have the dough boxes near the working station, but i dont understand how they prevent them from overproofing..
Any advice would be much appreciated.
Hi! I’m not making pizza professionally in a restaurant, so I don’t have any experience making a huge number of pizzas throughout the day. But my suggestion is to store the pizza balls in the fridge, and take them out around 2 hours before you need them, to let them come to room temperature.
Hi, when I make my pizza dough, it does the initial rise. When it comes to proofing the dough balls- they do increase in size but they always spread out. They never stay rounded. I’ve tried both ways-to keep the dough out overnight, but also tried to put in the fridge. It taste good but I know I’m doing something wrong. Can you give me advice please?
Hi! It doesn’t sound like you’re doing anything wrong! It’s normal that the dough balls spread out and get flat. And the longer you leave the dough balls to rest, the flatter they will get. This is due to gluten relaxation. When the gluten relaxes the gluten network gets softer and the dough balls will spread out.
What is the temperature in your sorround you should check this first… Here they didn’t mention the exact room temperature.. but it should be anywhere 18-25 celcius then your dough might not overproofed for long time… And you have also need to understand which flour you are using and how strong gluten you are creating..
I don’t know about quick chains, but I did work in a very high end Pizza place and and in the process of trying to find one to take over or rescue. Restaurants use a combination of light cooling racks for pizza. As demand requires pans are removed from the cooling racks and let to return to room temperature. The cooling racks are in a special refrigerator that doesn’t get too cold. I do know of a chain that makes two batches a day, one for lunch (started the night before), and one for dinner (started early morning) and they do not use coolers. I am sure there is a subtle difference in the dough from the first one of the day to the last, but most people can’t tell the difference.
Thank you for the insight – great information!
PS, Great stuff here, making pizza at home in small batches is quite different than big batches at a restaurant. I have been working on sourdough based doughs and Caputo dopio based doughs. Thanks for the work.
Most pizzerias where I grew up had special cabinets under their wood counters top where they made the pizzas.
The dough was kept in small stackable aluminum tubs and stored inside. Check WebstaurantStore for the tubs and maybe the cabinets.
Before balling , do you need to ‘knock back’ the dough after fermentation ?
Yes, it will help redistribute the sugars and yeast in the dough after bulk fermentation, and give a little more even of rise of the dough balls. Thank you for the great question, I will clarify that in the article as well!
If I make 7-8 dough balls, proof for 24 hours but only cook a few, can I leave the remaining dough in the fridge to cook during the week? Or is it better to put the remaining dough balls in the freezer until ready for use?
If you plan to use them within 2-3 days, you can store them in the fridge. Any longer than that, I would freeze the dough balls.
Ditto as Andreas.
Additional notes:
– Keep in mind that your dough balls will CONTINUE TO PROOF while in the refrigerator. That’s why you can place them there for another 2-3 days but they should be frozen for any longer than that.
– Temperature is very important in proofing. “Room Temperature” in Arizona may be 79-80 degrees (Fahrenheit) but only 67-69 degrees on the northern California coast.
I live in Arizona. My dough balls over-proof in less than 24 hours (for A/C costs, temp is kept around 80 degrees). So I’ll let them 2nd proof for 2 hours, but then place them into the fridge for the next day or two and take them out 3-4 hours before use.
But when I’ve made pizza in cooler climes I’ve been able to leave them out (covered) for 48 hours.
– Finally, 2-3 days is really the best for the “maturation” of my dough. I can make it the same day (early morning) or the day before. But really, if I make it on Wed to eat on Fri I get a MUCH better *chew* or *bite* and the dough really is more flavorful.
Not that anyone else really notices so it might be in my head. 🙂
Hi there, would it be possible to cold proof the entire dough for 24 hours in the fridge, and then divide and ball them and return them to the fridge for another 24 hours?
I need to transport the dough 24 hours before cooking the pizzas, so it would be easier if i could do this with the dough altogether rather than balled.
Thank you!
Yes, that’s possible! But if you don’t let the dough balls rest before you stretch out and shape the pizzas they can be elastic and hard to stretch because the gluten will get tense when you ball the dough. So you should leave the dough balls at least a couple of hours at room temperature (ideally 4-5 hours) for the gluten to relax.
Thanks for all this info!! I’ve learned a lot from your site and have been making Neapolitan style pizza for a little while now in my makeshift backyard wood fired oven (really hoping to build a real pizza oven one day). I have a question about bulk fermentation. Your instructions are to let the dough bulk ferment for about 14 hours before making the dough balls. I watched some YouTube videos of Neapolitan pizzaiolos in Italy making their dough… and they only did their bulk fermentation for about 2 hours before making the dough balls and then letting them do the final proof in the pizza proofing box. Do you have any insight into the discrepancy? And how much of a difference with the 2 hours vs 14 hours make?
Personally, I prefer a longer (total) fermentation, because it gives the final product more flavor. Generally, longer fermentation gives better flavor. But if you let the dough ball rest for too long, the gluten gets too relaxed and they get too soft and hard to handle. So a longer bulk fermentation time makes more sense than extending ball fermentation.
In a professional setting, you have certain limitations, and you need to make the dough-making process fit your schedule. You need to make a lot of dough and it needs to be ready for lunch or dinner service. So a 24-hour fermentation time could be impossible because it would require twice the space to store the dough. This is something you don’t need to worry about at home, and a longer bulk fermentation may also be more convenient. I wouldn’t wake up at 4 am or be 3 hours late for work to make dough balls 🙂
Convenience and better flavor are the main reasons I make 24-hour Neapolitan pizza dough most of the time, rather than e.g. 10-12 dough.
Hi there, I also have a question to which I’m struggling to find a solution to. I run a small pizza business (food truck). During summer I’ve had no issues with proofing in time for service but in winter it’s a different story completely.
I normally mix a large batch of dough (120 balls) and starting in the morning usually gives the balls enough time to proof for service and throughout the day. I ball the dough up in the truck and leave the balls to proof in the trays under the counter. It’s got pretty cold in there and nomatter what I do the balls are still under-proofed by service. Leaving the trays out of the truck isn’t an option as it’s way off site to where I mix the initial batch.
Any ideas on how I can speed up the process in a cold environment without the use of commercial equipment? Any help appreciated!
It’s tricky to proof pizza dough if you don’t control the environment. Depending on how cold it gets you can try to increase the amount of yeast to speed up the fermentation (alternatively, decrease the salt content).
It seems like you do the bulk fermentation at a different location, so another option is to do more of the proofing before moving the batch and balling it. If you e.g. currently do 50% of the proofing in bulk, then the remaining 50% in ball, you could do 80% in bulk and 20% in ball.
As someone that proofs in the oven. My trick is to leave the light on. Mine holds the temp at exactly 80 degrees.
Hey,
I made my dough today on my lunch break for dinner tonight and left it to proof on the counter. Normally I proof it for 2 hours on the counter but this time I went over by a hour or so not thinking it was a big deal. When I went to go and cook the pizza the dough look to be over proofed.
If I proof it on the counter for the two hours but find that i’m not going to be Abel to use it right away can I put it in the fridge to prevent it from over proofing?
Yes, absolutely! 🙂
I do that all the time. I often even plan to do most of the fermentation at room temperature and stick it in the fridge when it’s almost ready. Then simply pull it out 1-2 hours prior to baking.
Hi, thanks for the wonderful recipes! Can I ball the dough on a baking pan and cover with plastic wrap for the final proofing?
Yes, absolutely! 🙂
Hi, ok now my question is after the dough balls are made,( after the overnight proof and shaping and sizing is done) . How do restaurants ensure that those balls don’t overproof ?( let’s say for a small scale pizza restaurant, medium busy restaurant) . Let’s say after balls are made around 9 am, it’s put into the fridge to slow down fermentation and removed at 12 for one o clock service, but no one shows up until 2 pm, what do they do then? Sorry for the long question
I don’t have restaurant experience, but I think you might want slower fermentation to give you a larger window to use the dough before it over proves.